Ekoenergetyka - Configuration for ChargePilot
Before starting the configuration, please check the charger firmware version complies with the latest compatible firmware version.
Connection to the charger | |
Local connectionConnect to the charger web interface
Login Data: | 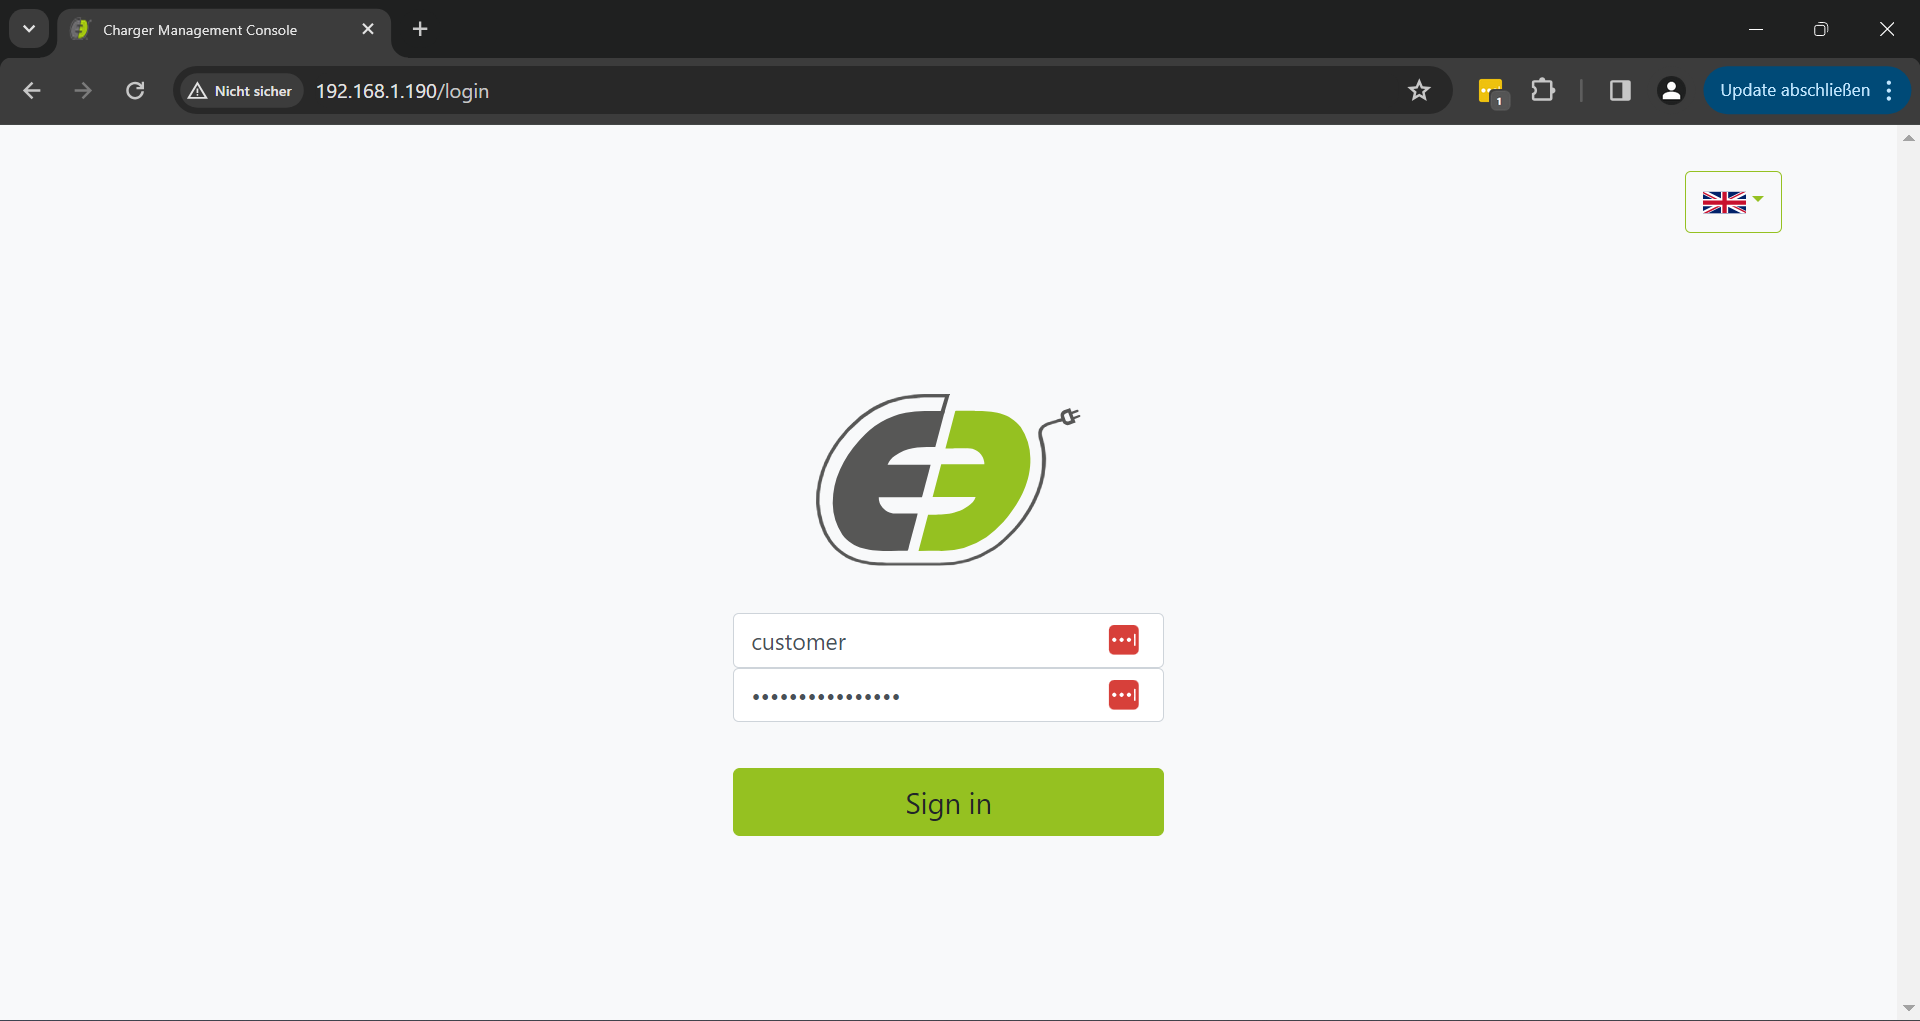 |
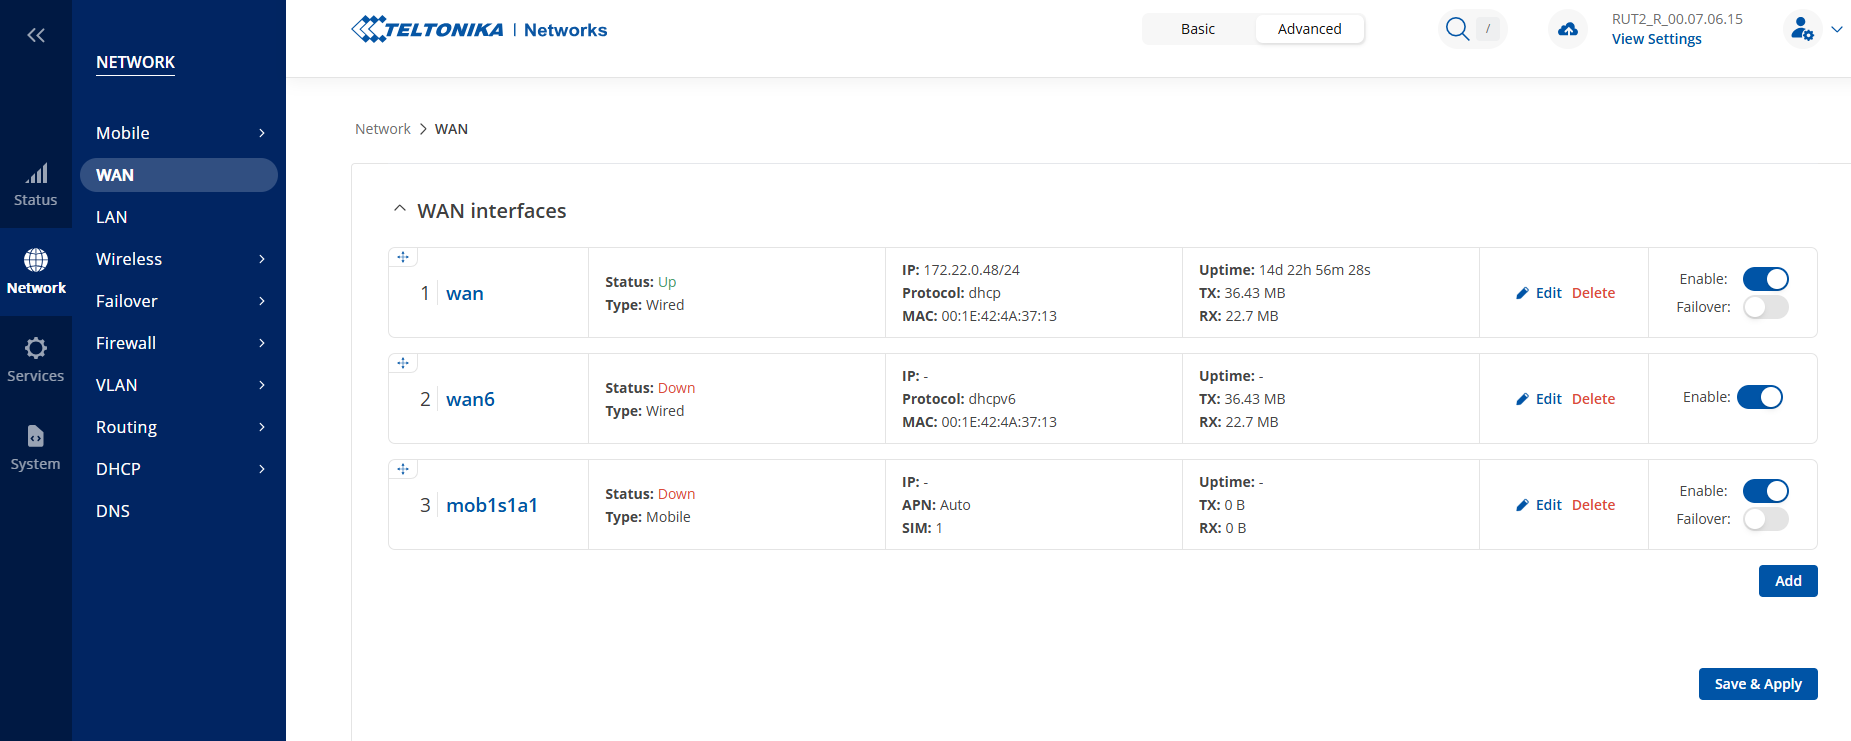
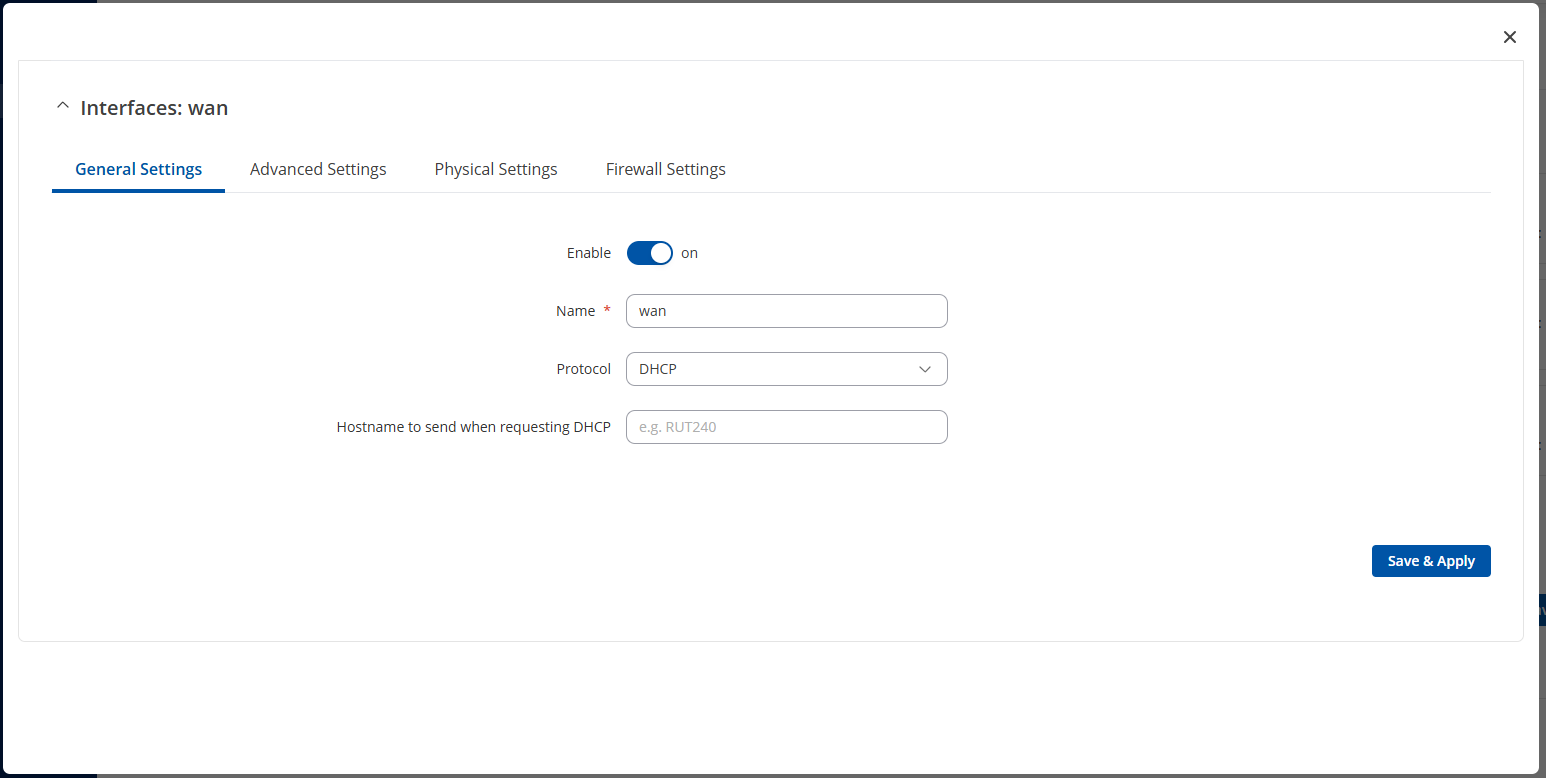
Network settings | |
Ethernet
|   |
OCPP settings | |
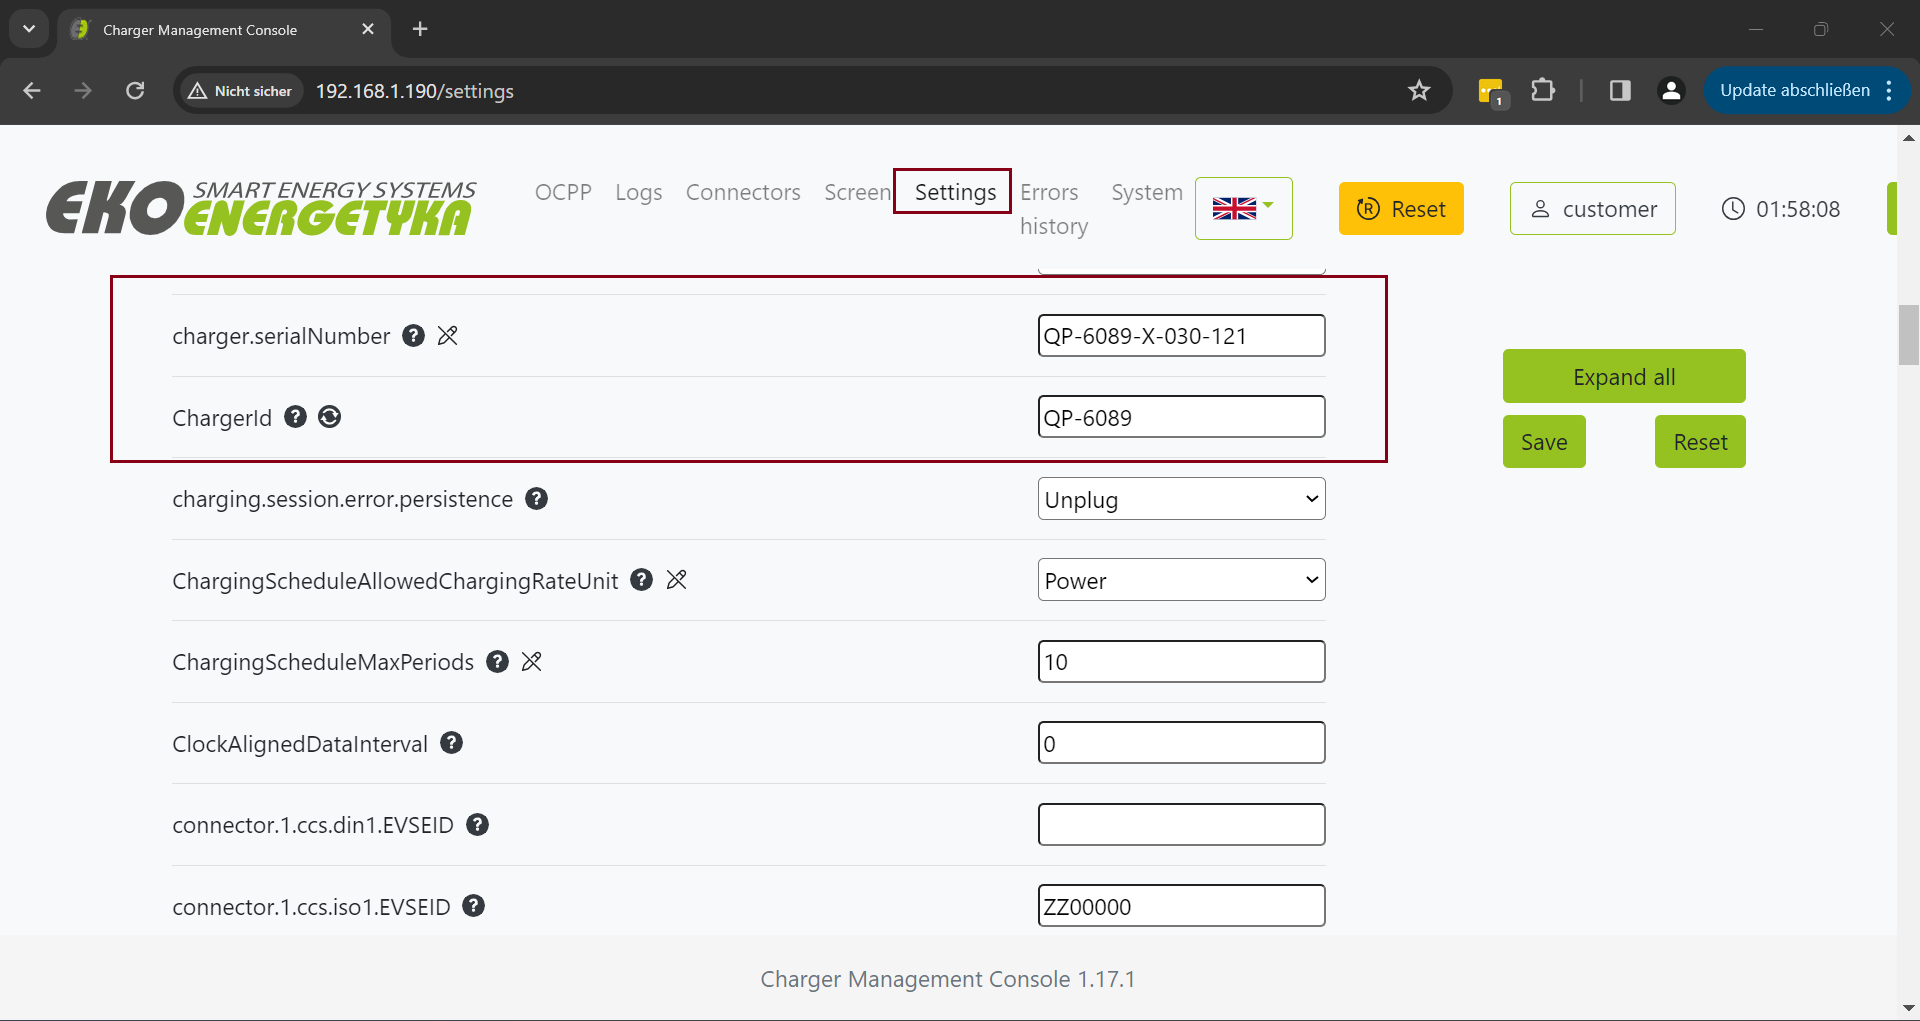
Backend
OCPP ChargeBox ID (ChargerId)
| 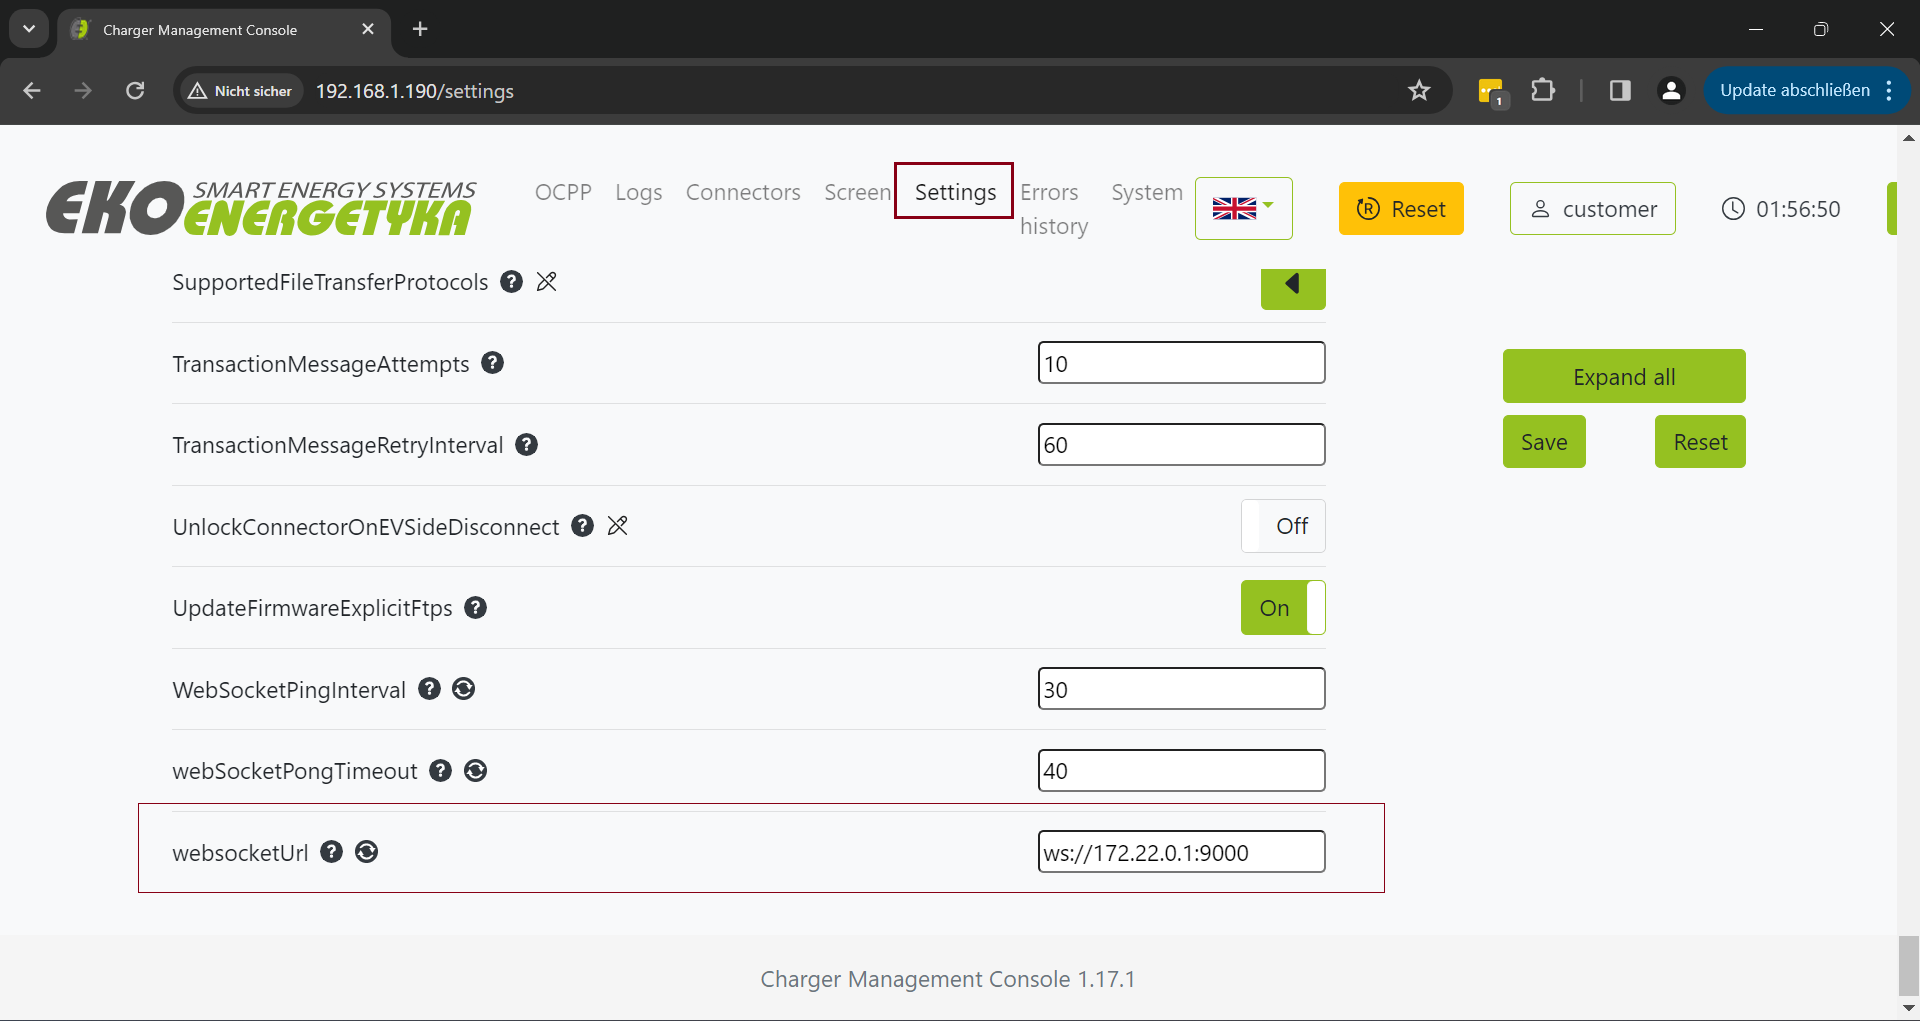  |
Other charger settings | |
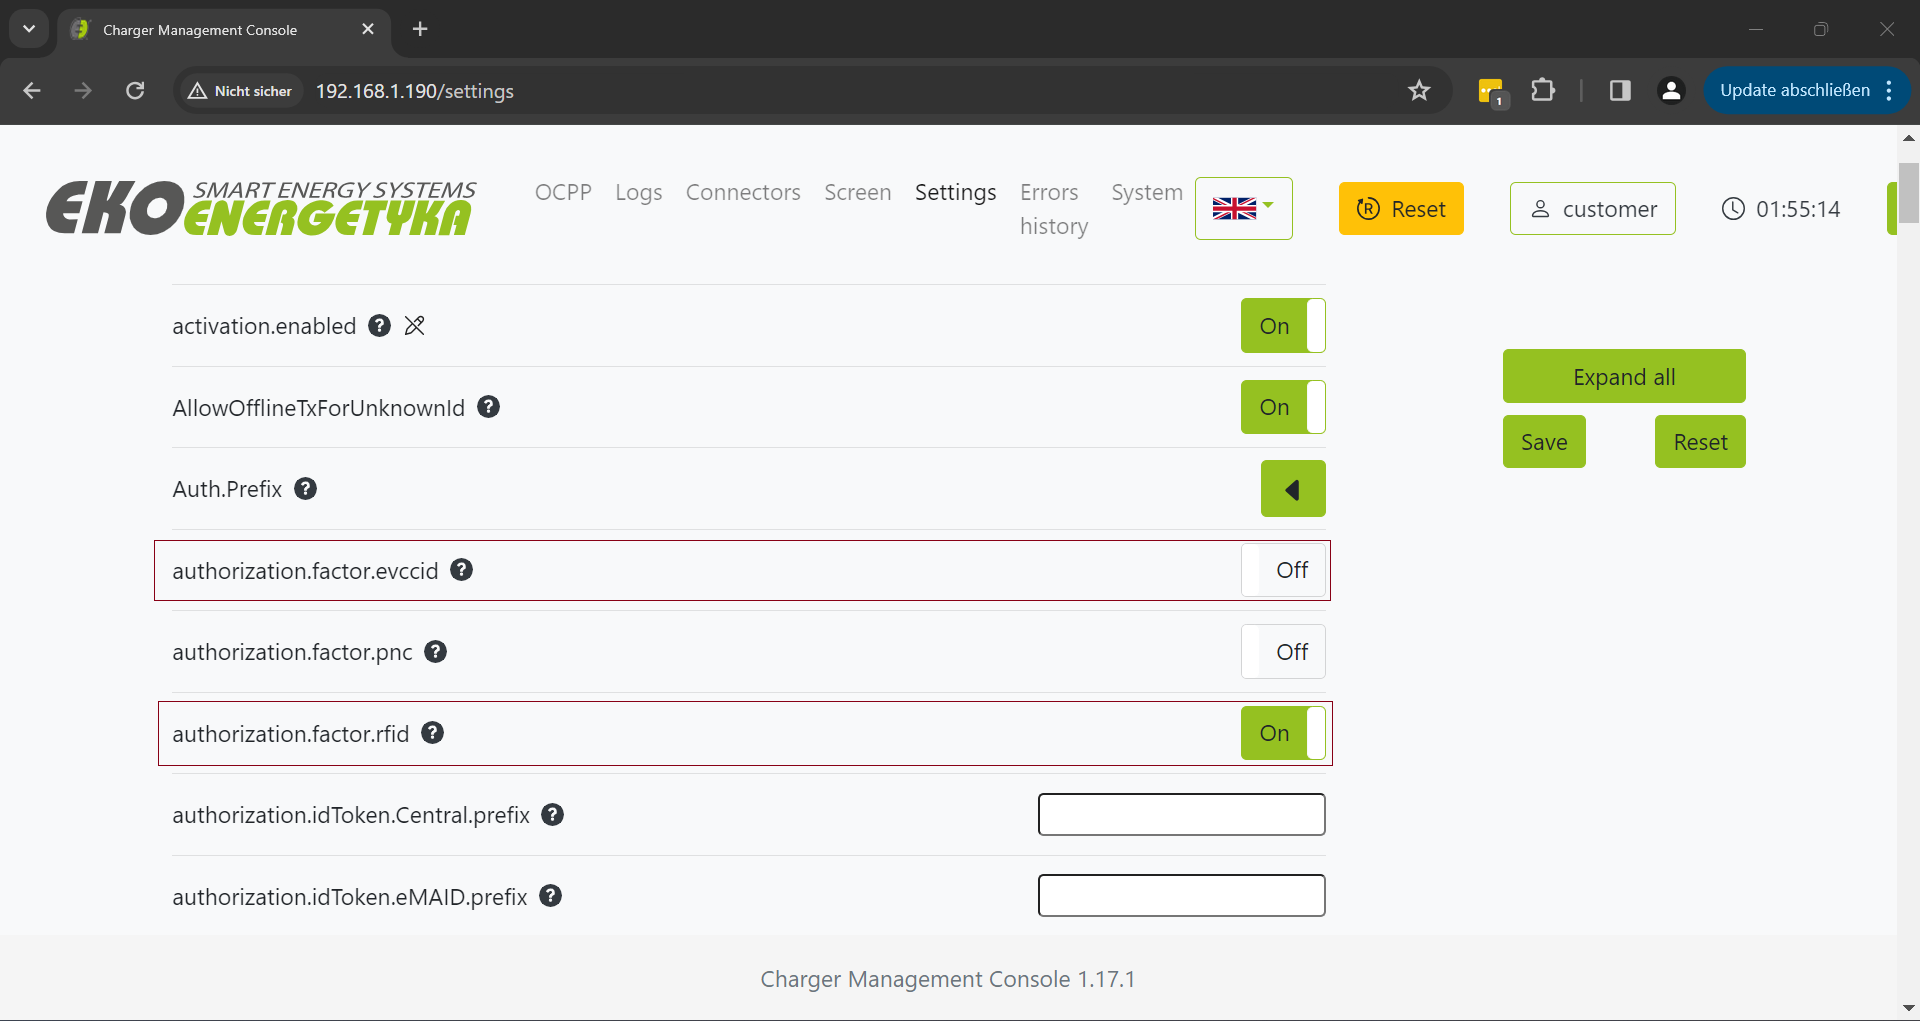
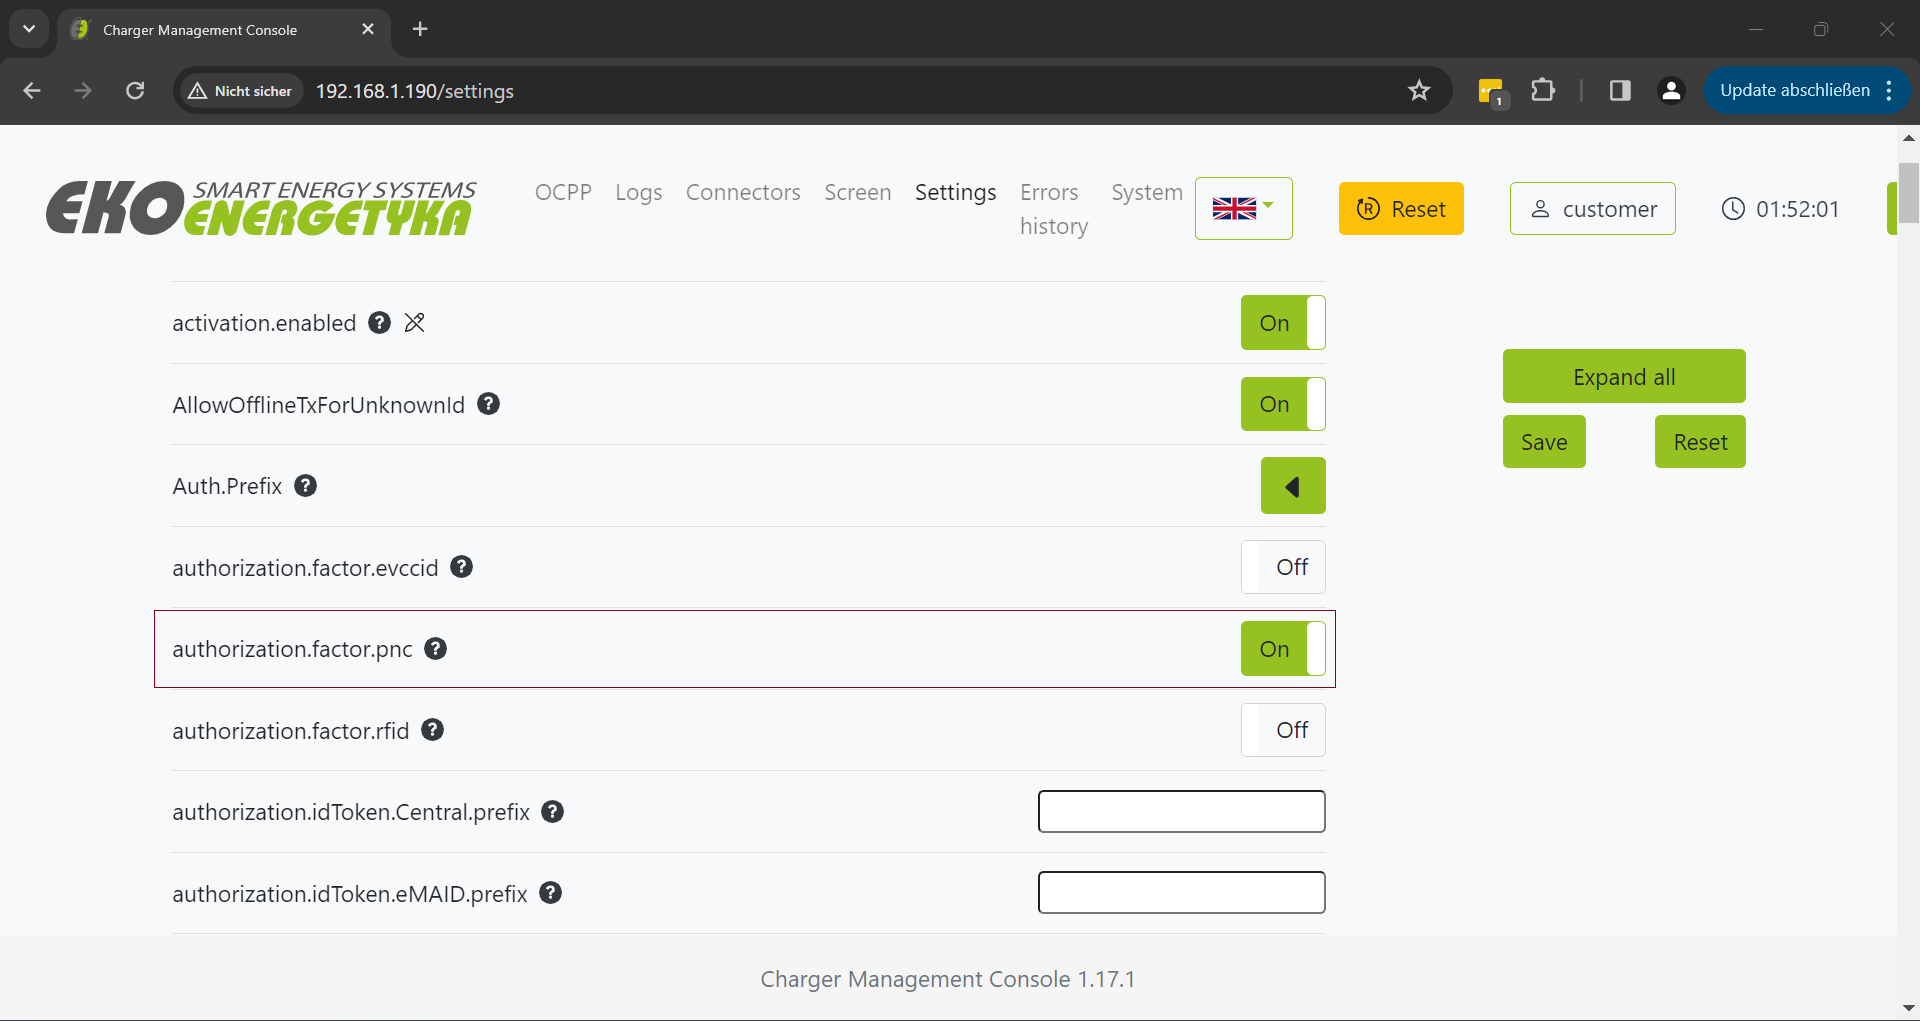
Authorization settings
|  |
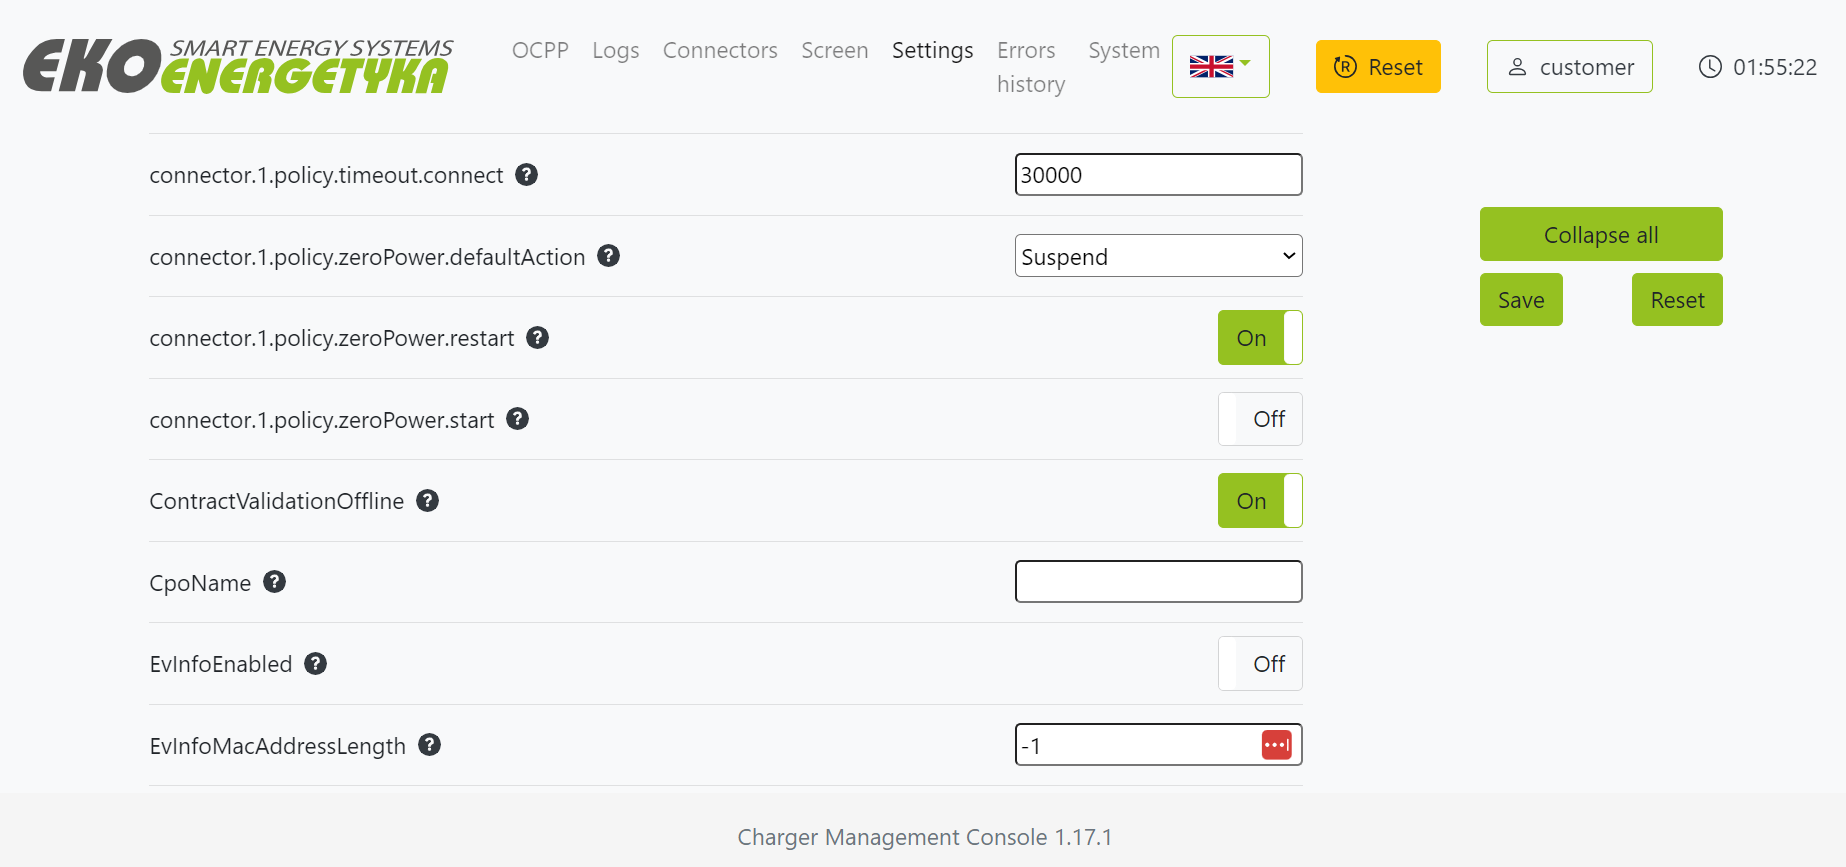
Charge process suspendedThis functionality applies for the use cases , if the user would like to pause the charge process. By default the charge process will go to finish status when the charger receives a 0 W offer, or when the EV is fully charged.
|  |
Autocharge/Free charging settings (tbd)When this function is activated, charger starts transaction either with the identifier predefined in the charger, or with the EV MAC address (Plug & Charge).
|  |