Alfen Eve Single Pro Line - Configuration for ChargePilot
Alfen Charger are normally preconfigured for interacting with the Charge Pilot system. By clicking through the following steps you can ensure that all settings are set correct.
Configuration for ChargePilot
Part A: ACE Service Installer
Step 1: → Installation ACE Service Installer
ACE Service Installer login credentials:
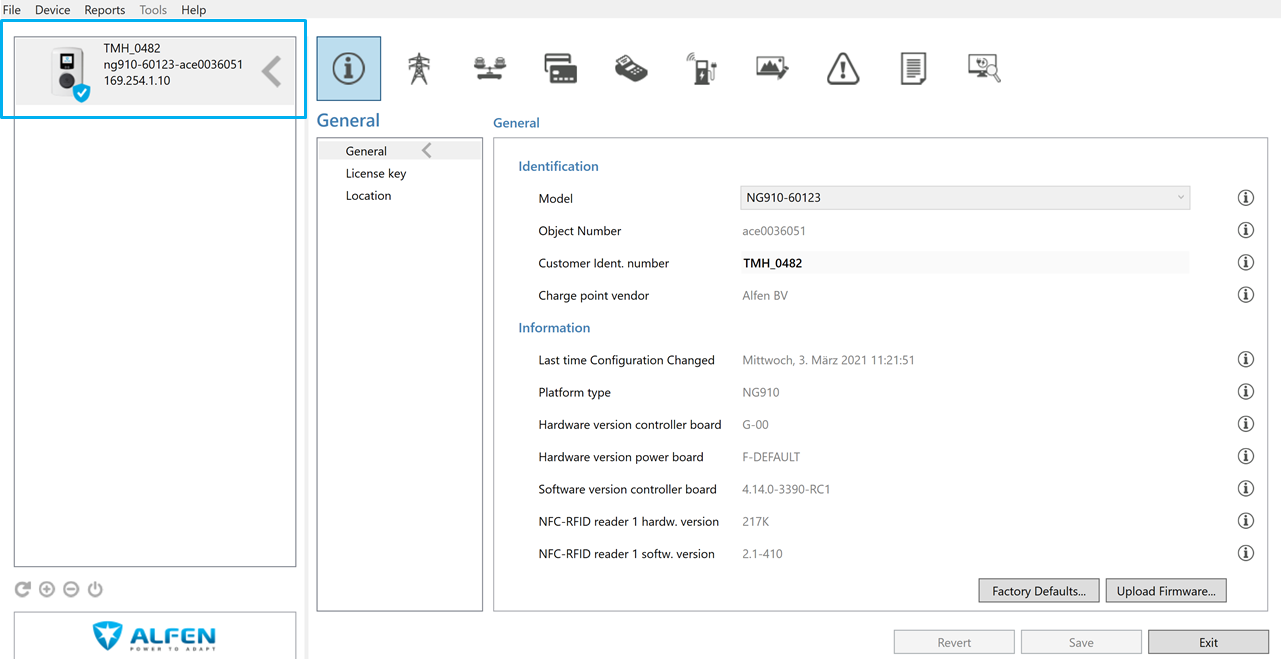
If the connection between laptop an station was successful the Alfen Eve Single will pop up on the left side including network connecting informations (IP).
|  |
Step 2: → User Interface ACE Service Installer
|  |
Part B: Configuration Alfen Eve Single - General
Step 1:
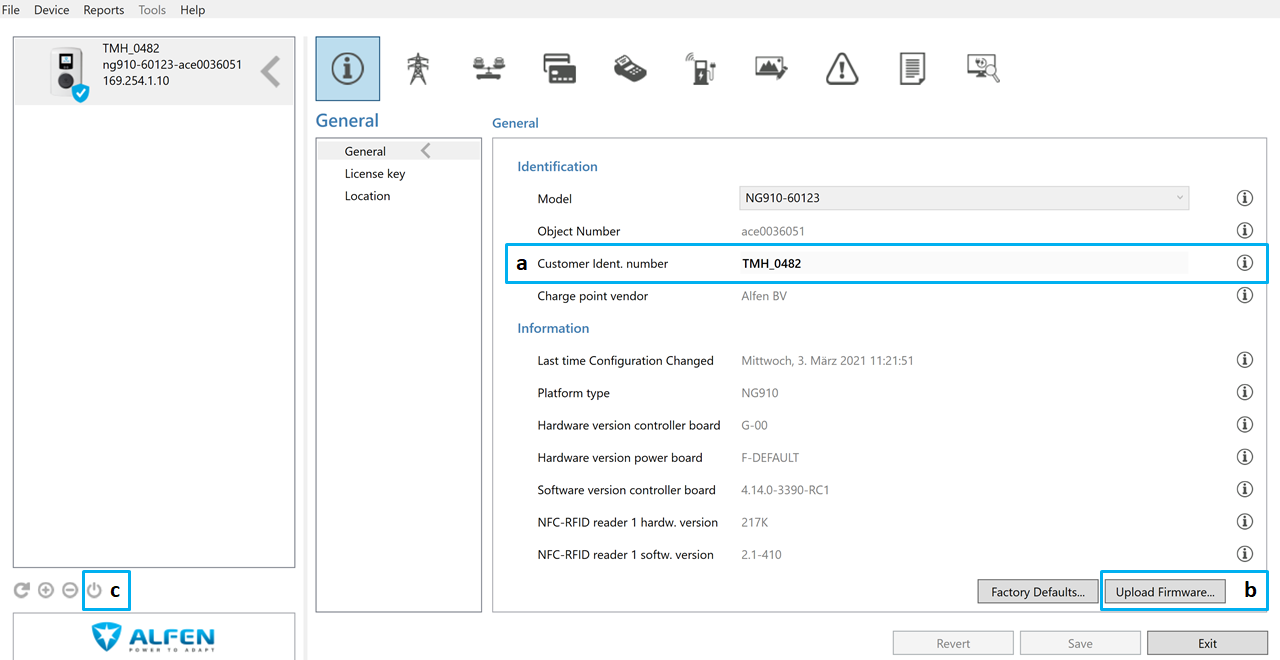
Please check if the Customer Ident. Number is equal to the serial ID that you can find on the installation protocol.
|  |
Step 2:
Please check the latest released firmware version of this station here, before you update the station. For firmware updates you can upload the newest firmware provided by The Mobility House via the button Upload Firmware.
| |
Step 3:
| 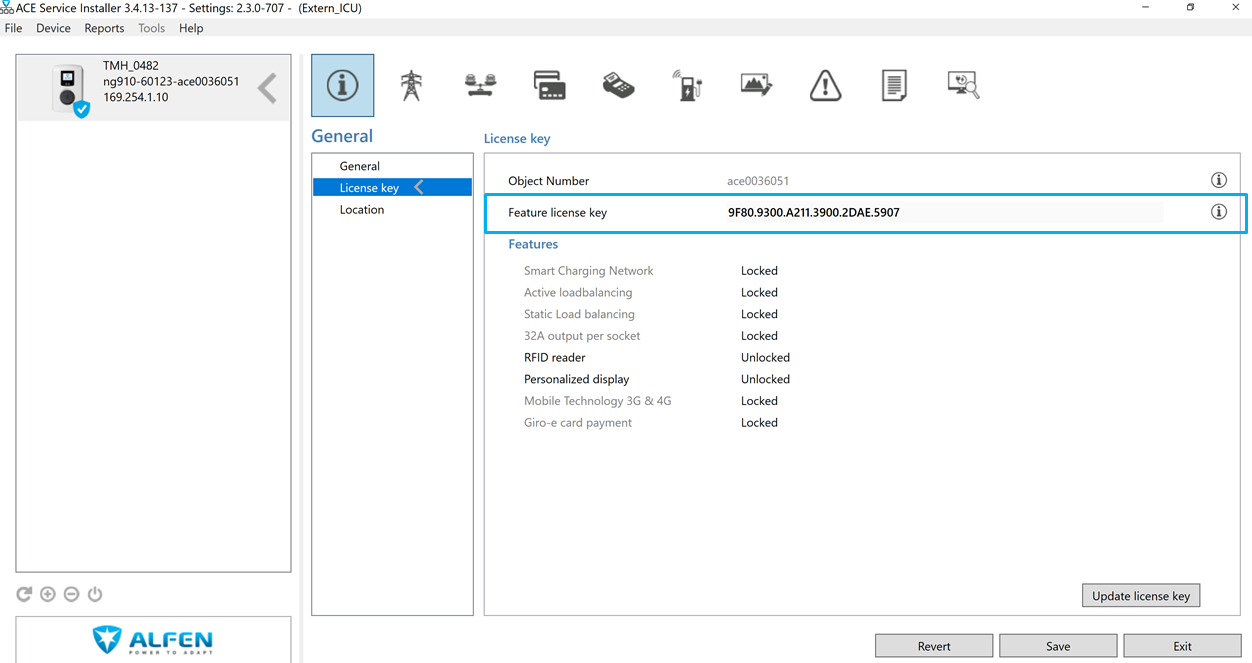 |
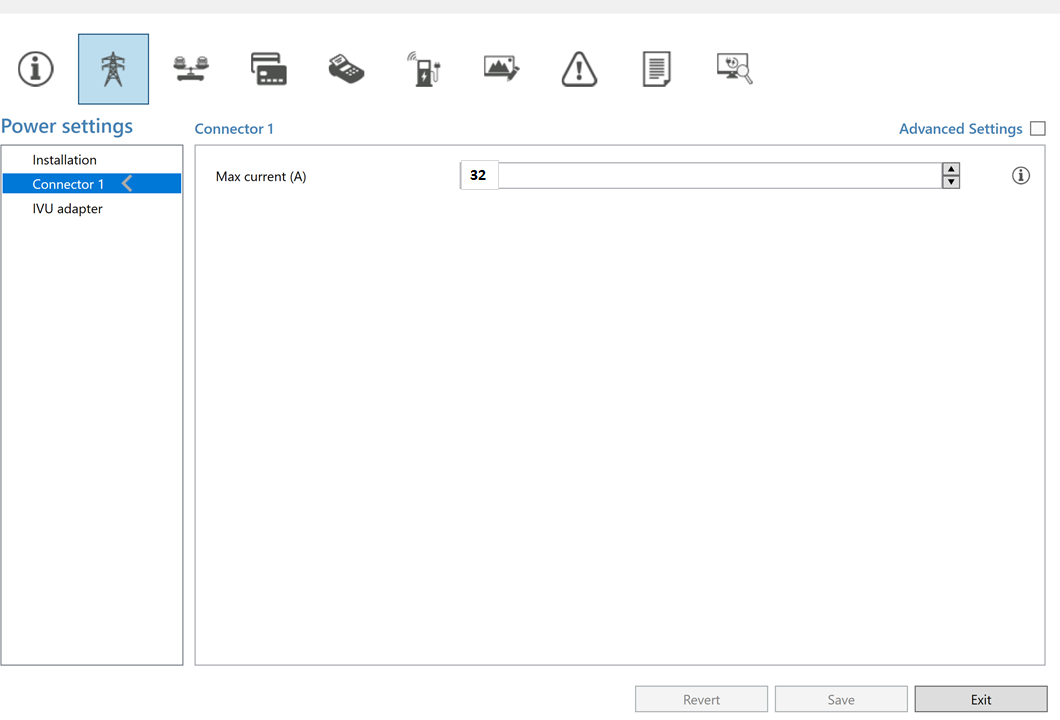
Part C: Configuration Alfen Eve Single - Power Settings
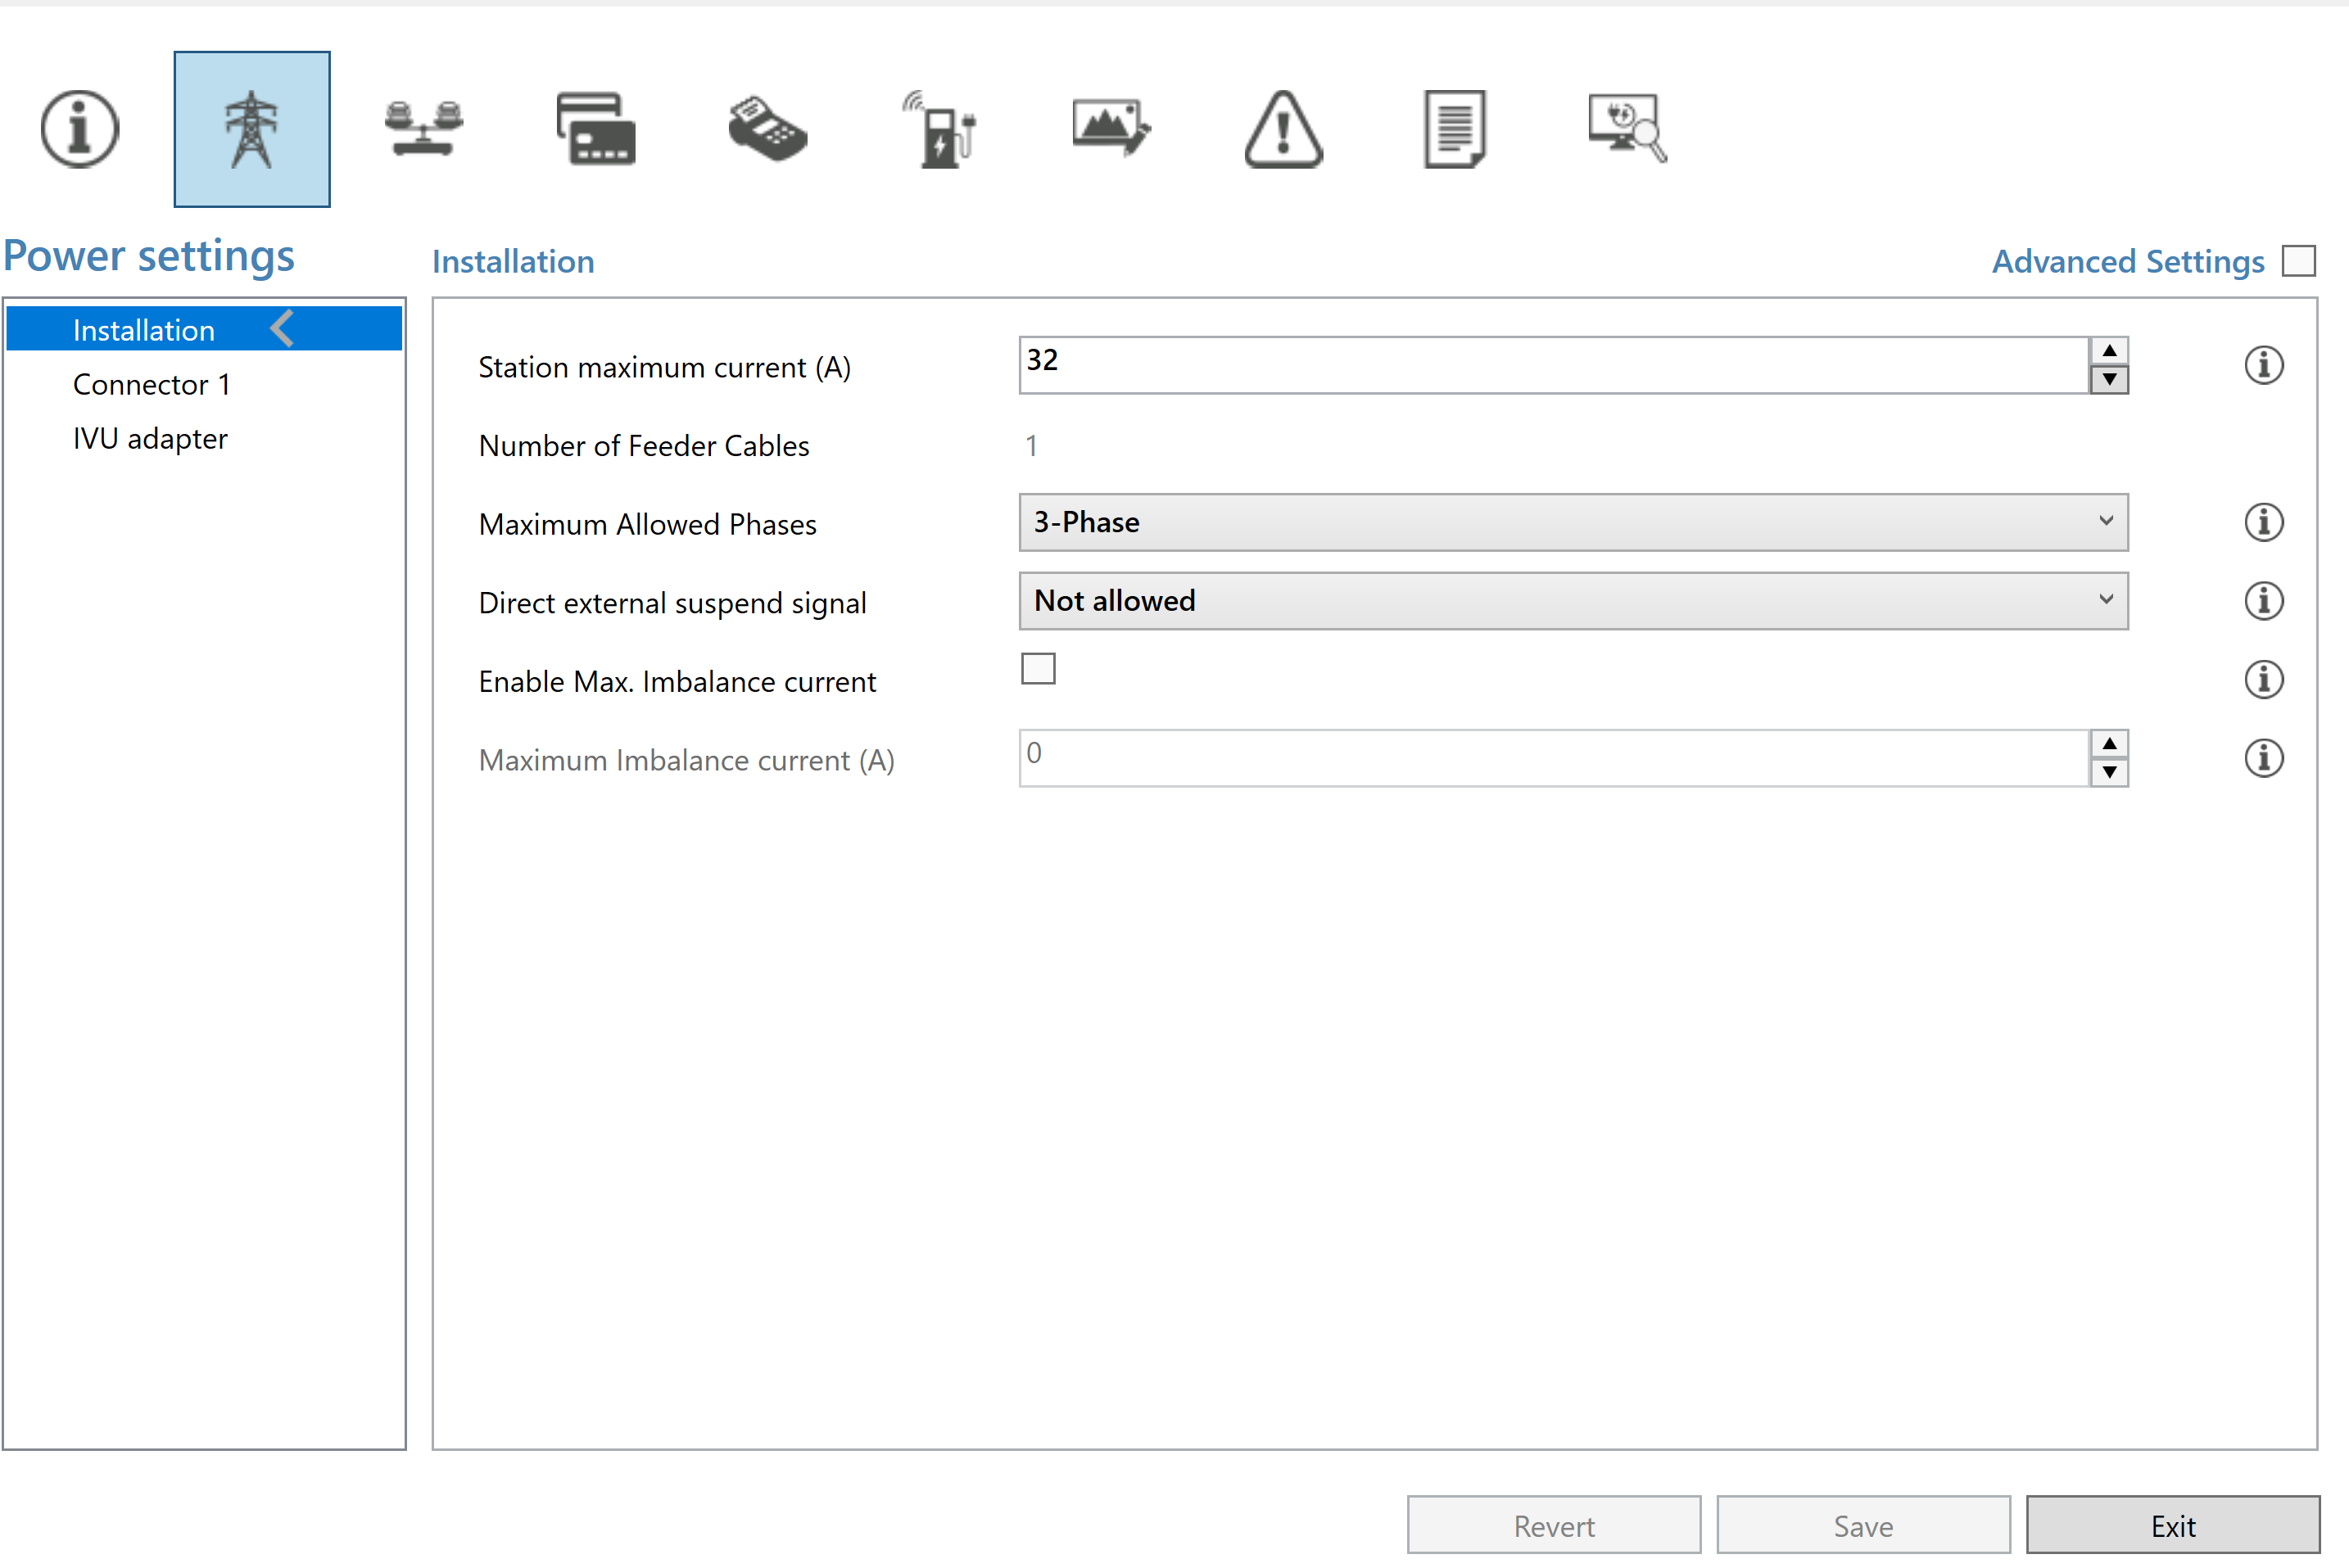
Step 4: The Power Settings should be set as you can see in the screenshots. It is possible to change the Station maximum current as well as the Max current of the connector. Make sure the current values are exactly set to ensure charging processes without exceeding the maximum fuse limit! Optional: Configuration Messestehle
|   |
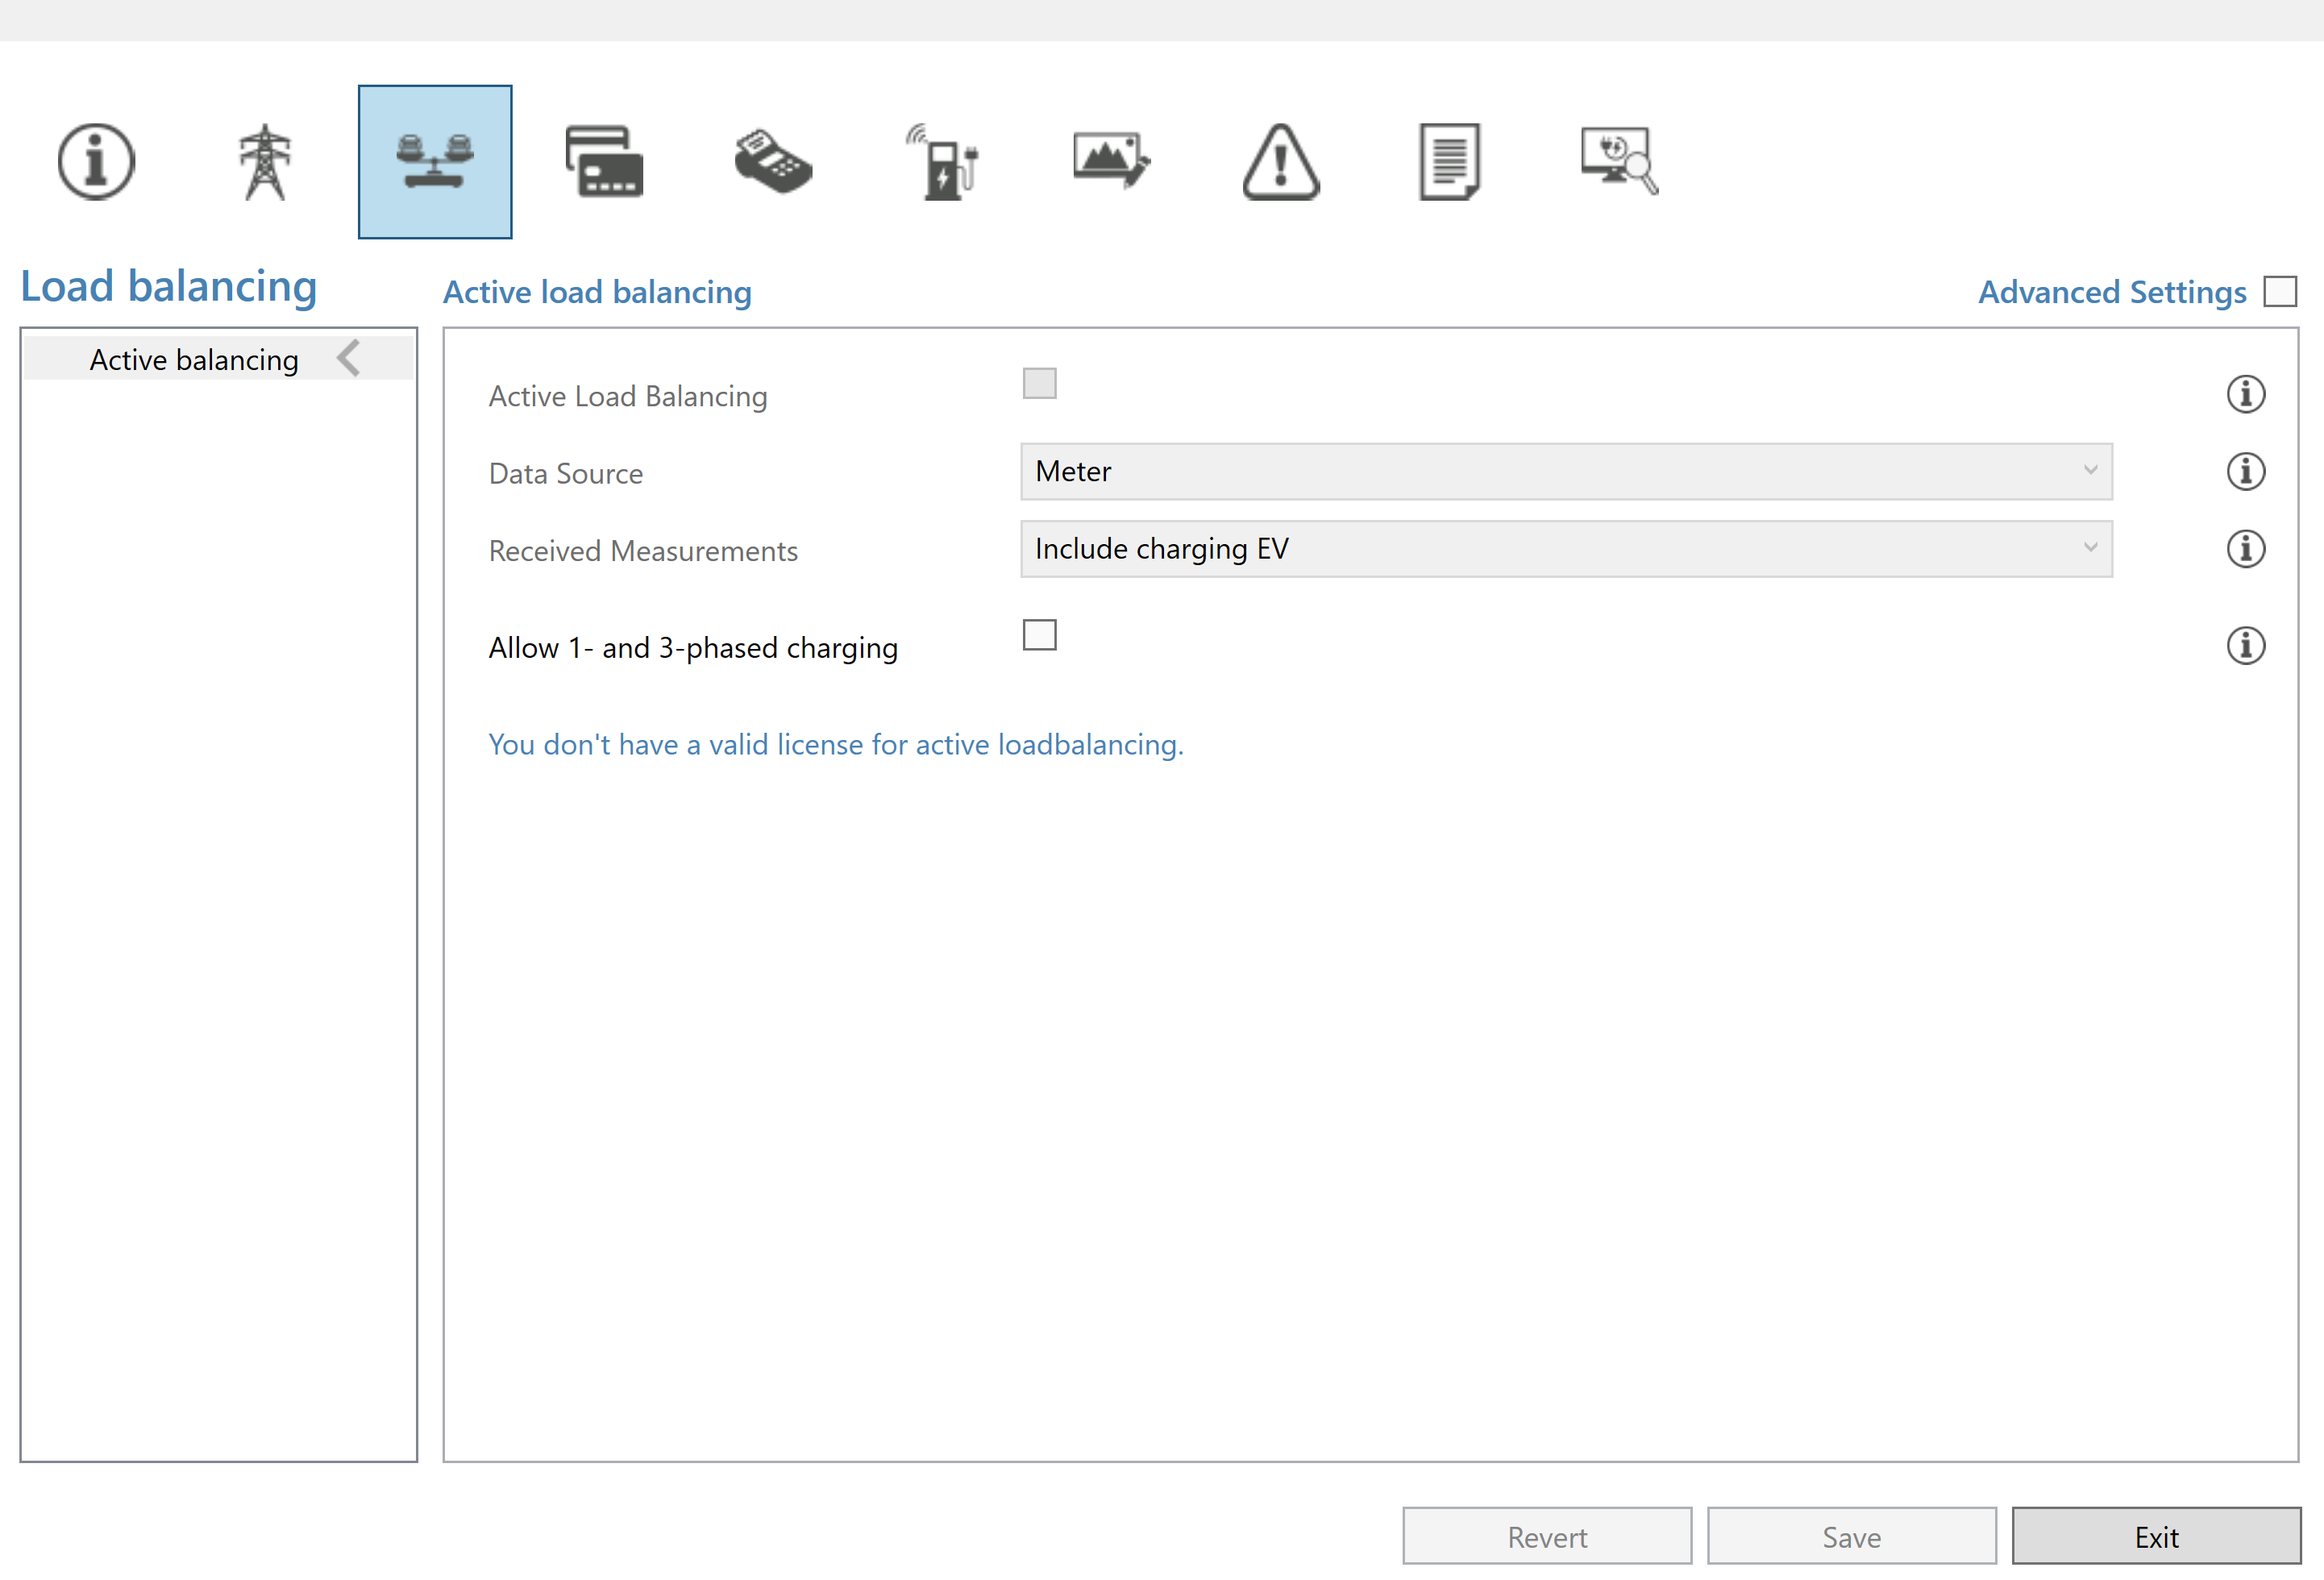
Part D: Configuration Alfen Eve Single - Load Balancing
Step 5: The Load Balancing Settings should be set as you can see in the screenshot.
|  |
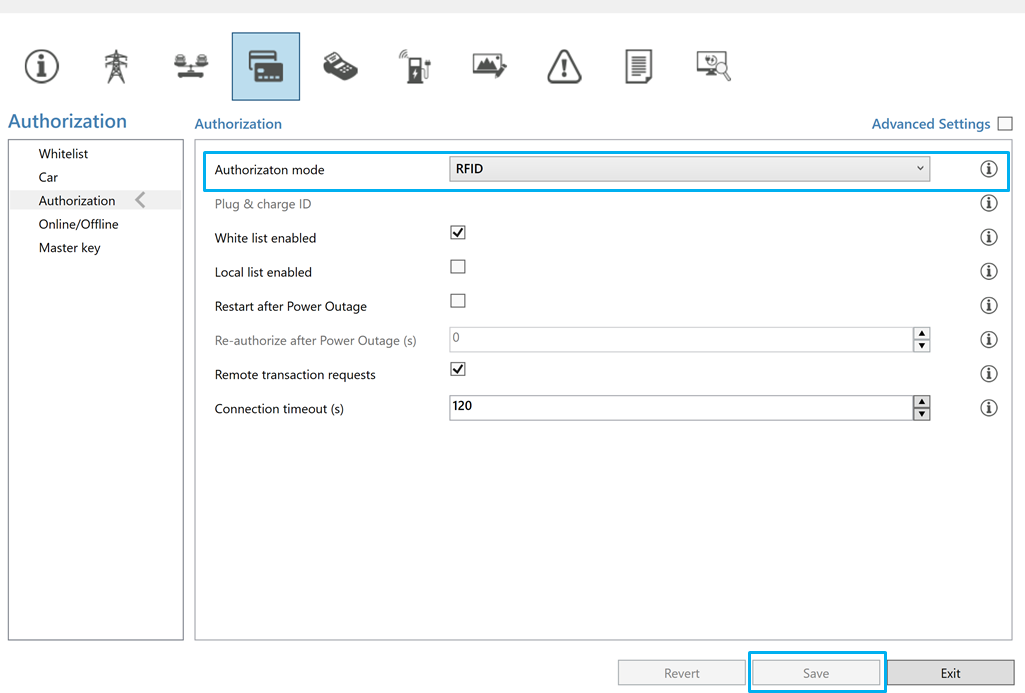
Part E: Configuration Alfen Eve Single - Authorization
Step 6:
Possible authorization modes:
This Authorization mode enables charging processes by simply Plug and Charge. Therefore it is necessary to set the authorization mode to Plug & Charge and enter “PLUGANDCHARGE” as Plug & Charge ID. Press enter and click Save to save the current settings.
This authorization mode only ensures charging processes by using predefined RFIDs. Therefore, it is necessary to change the authorization mode to RFID. Press enter and click Save to save the current settings.
|  |
Part F: Configuration Alfen Eve Single - View all Transactions
Step 7: No configuration settings necessary. |
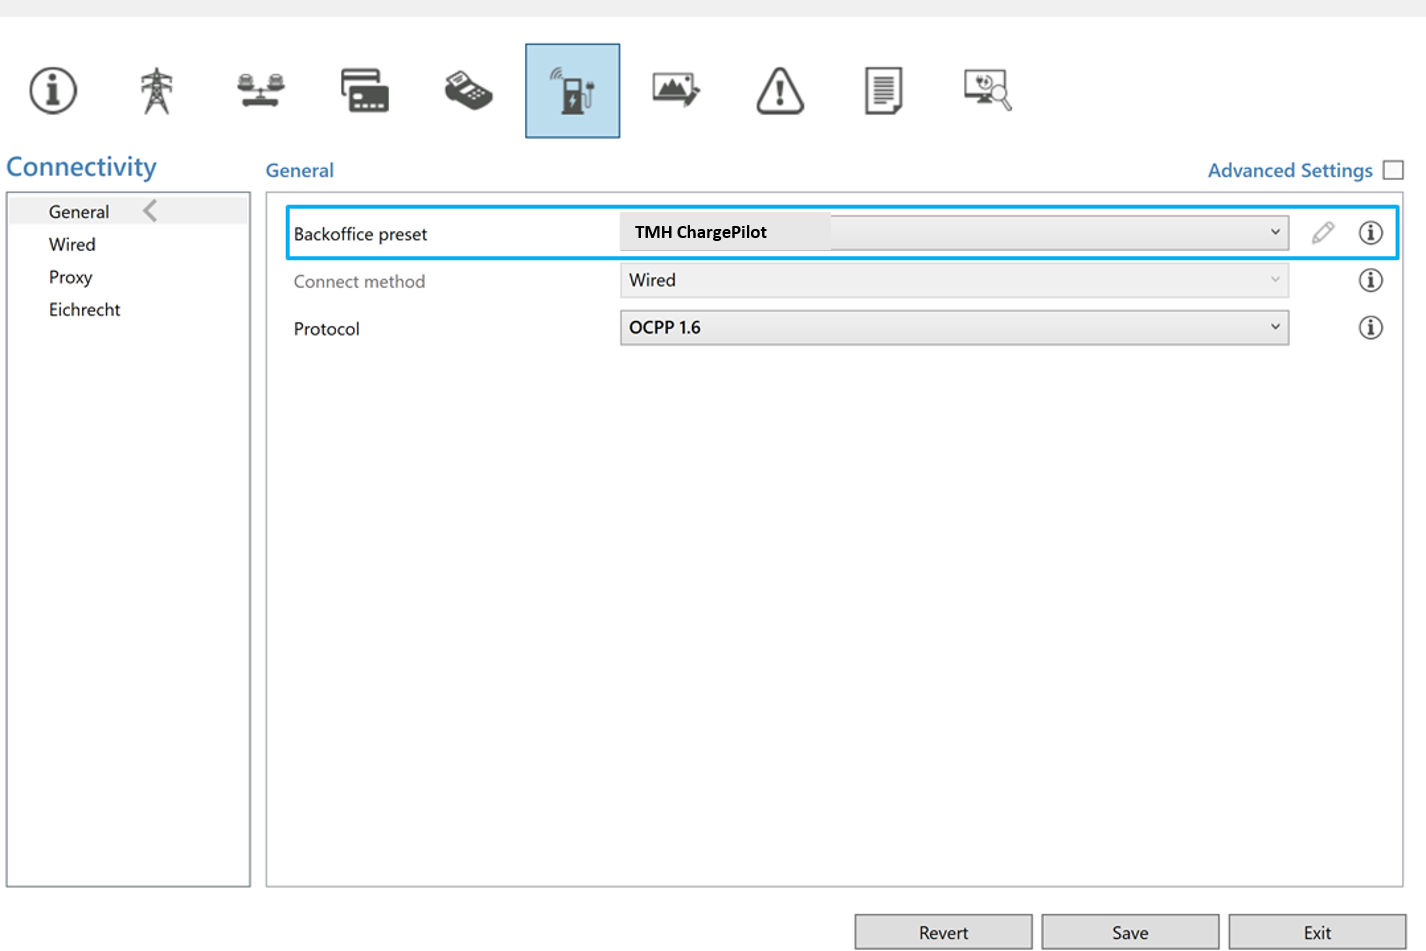
Part G: Configuration Alfen Eve Single - Connectivity
Step 8: The Connectivity Settings should be set as you can see in the screenshot.
|  |
Part H: Configuration Alfen Eve Single - Interface
Step 9:
Upload Image: For an individual screen you can upload the clients company logo as seen in the screenshot below. | 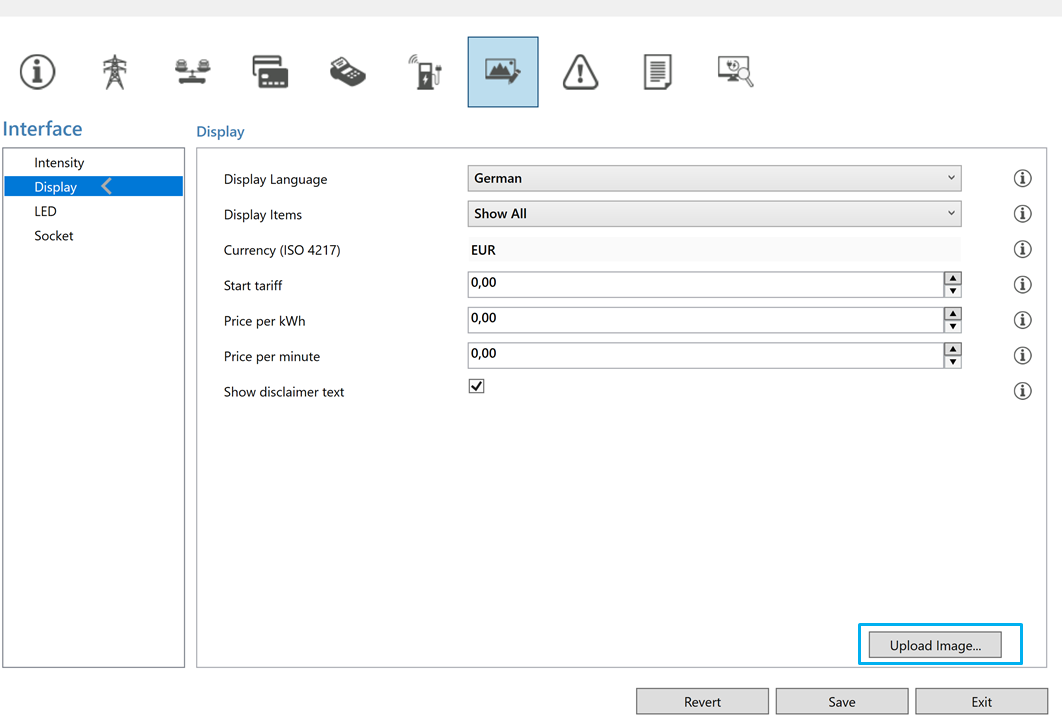 |
Part I: Configuration Alfen Eve Single - Alerts
Step 10: For standard configuration there are no settings required. | 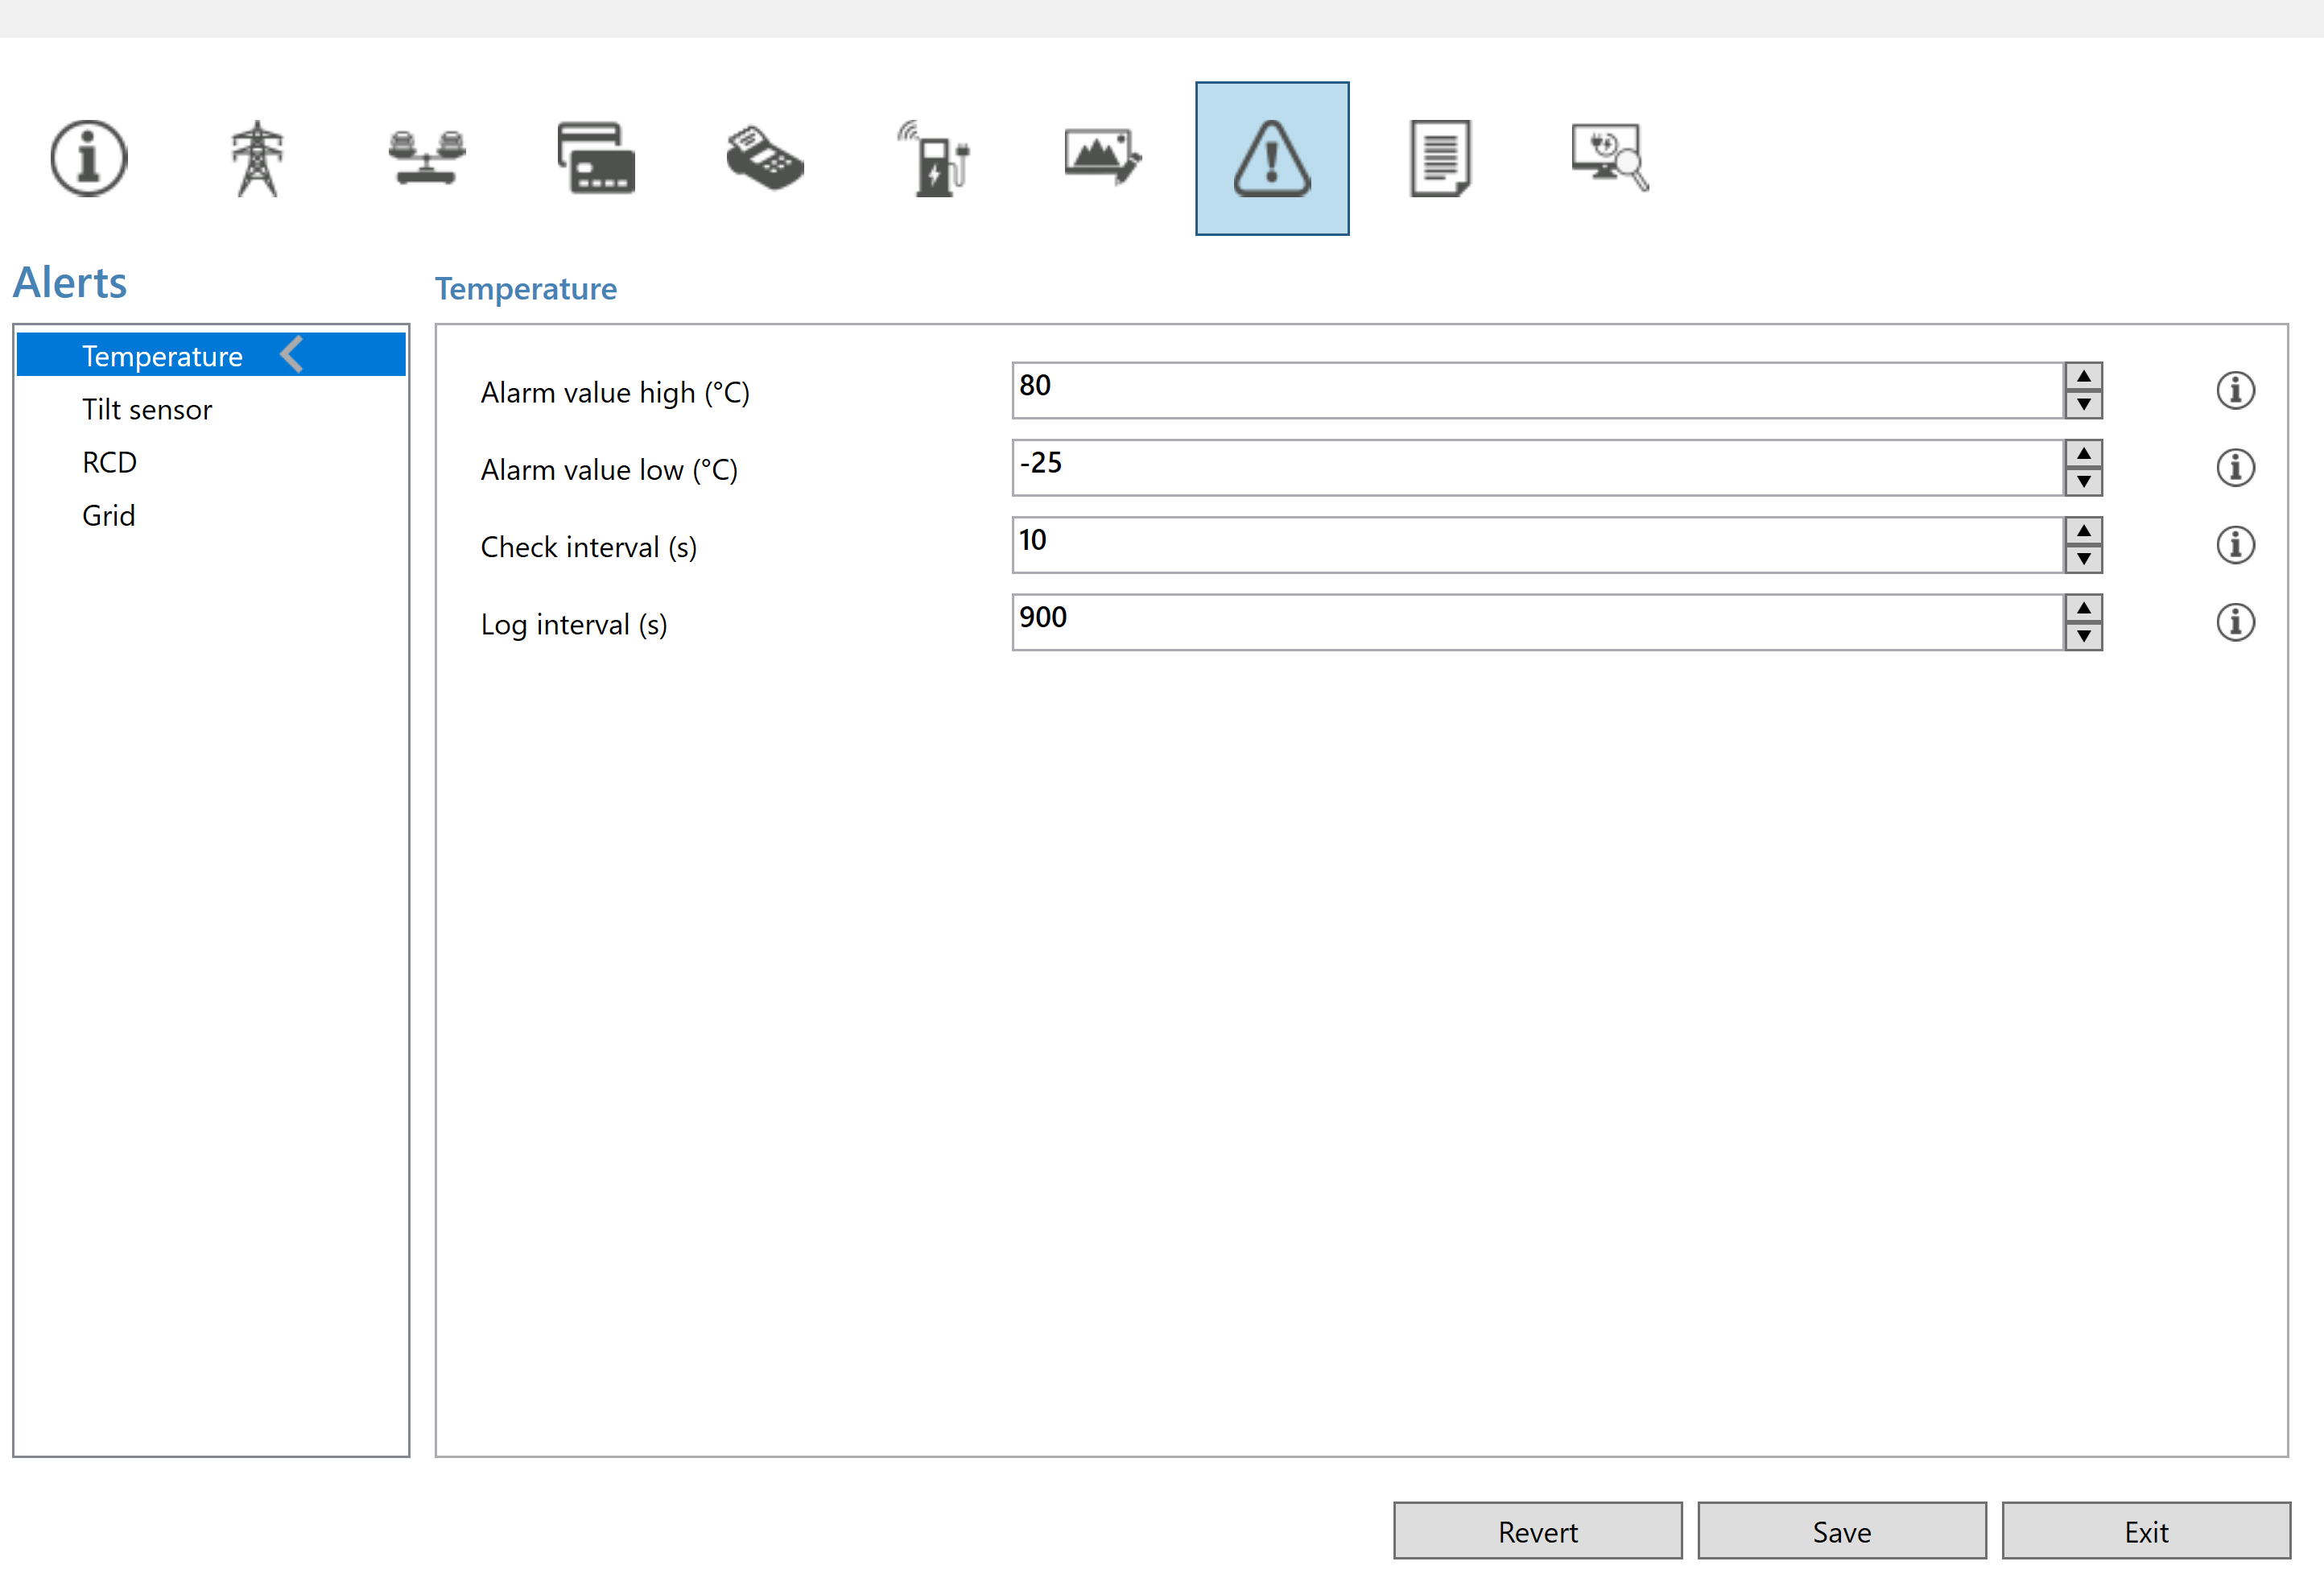 |
Part J: Configuration Alfen Eve Single - Logging
Step 11: In the Logs tab the user can observe the general logs of the Alfen Single charger, including OCPP messages.
|
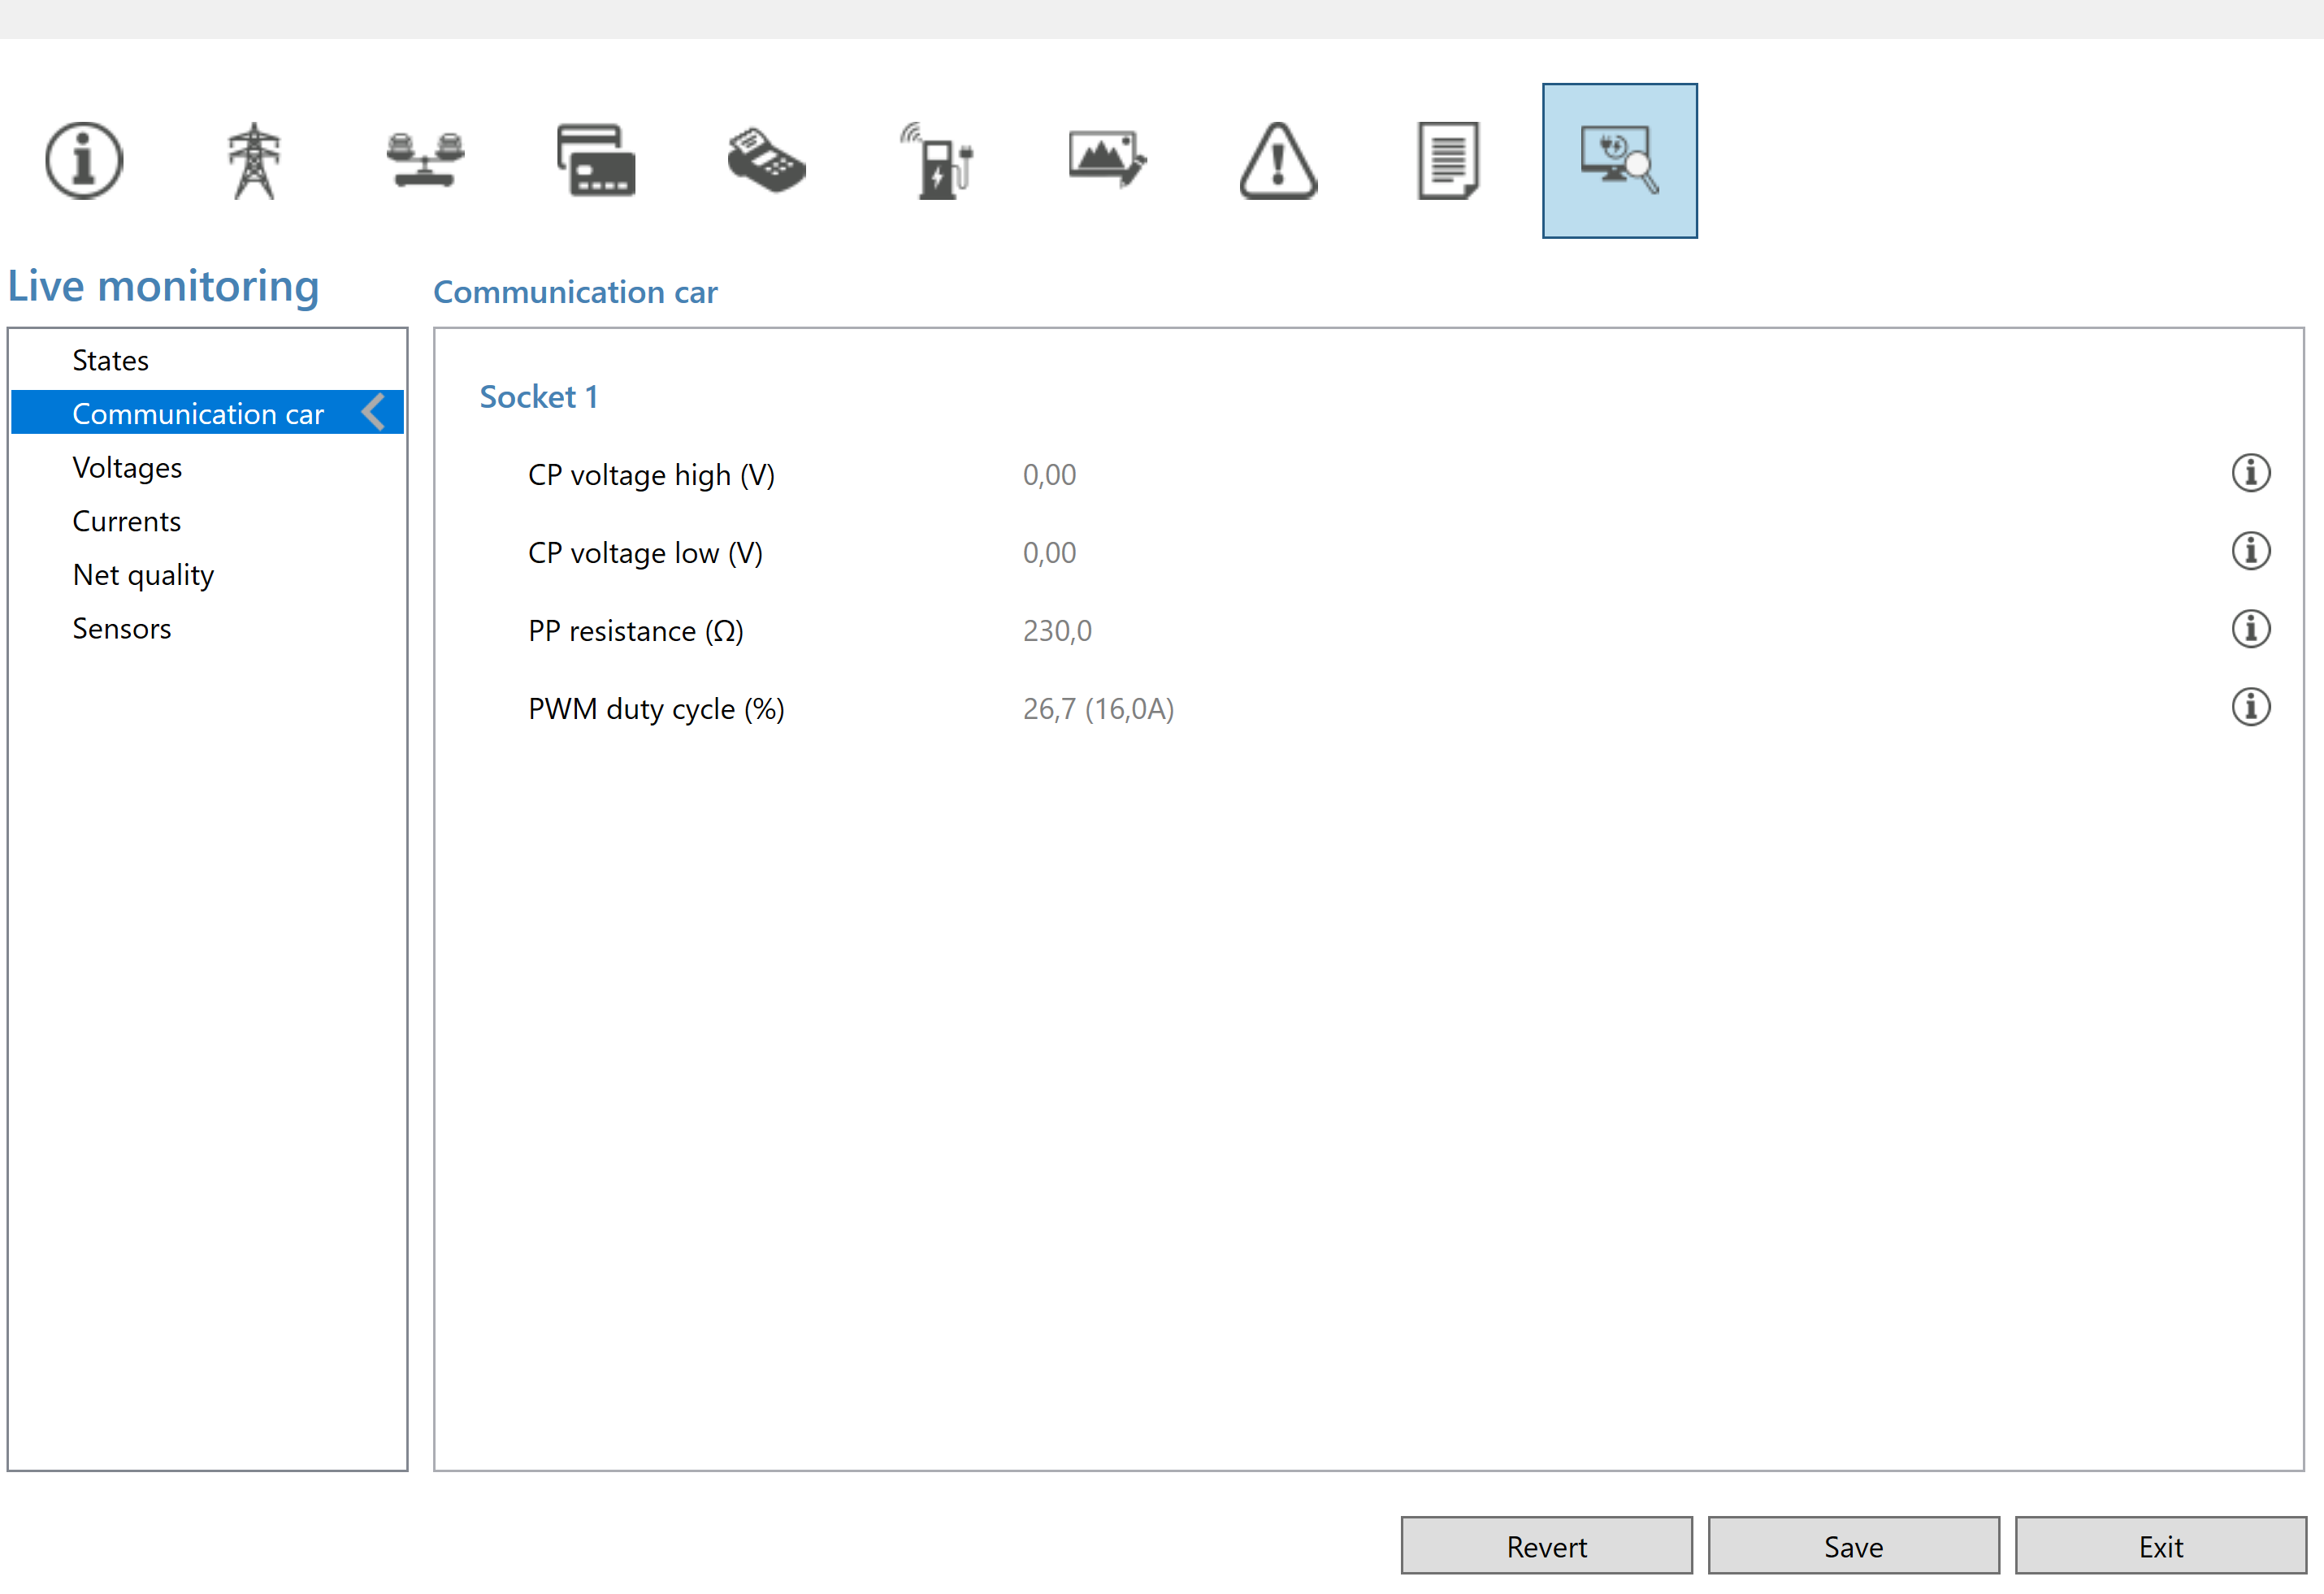
Part K: Configuration Alfen Eve Single - Live Monitoring
Step 12: This setting tab provides the opportunity to check the current station parameters and live data.
|  |
Additional Information
Logging
In the Logs tab the User can observe the Alfen Chargers general logs, including OCPP messages.
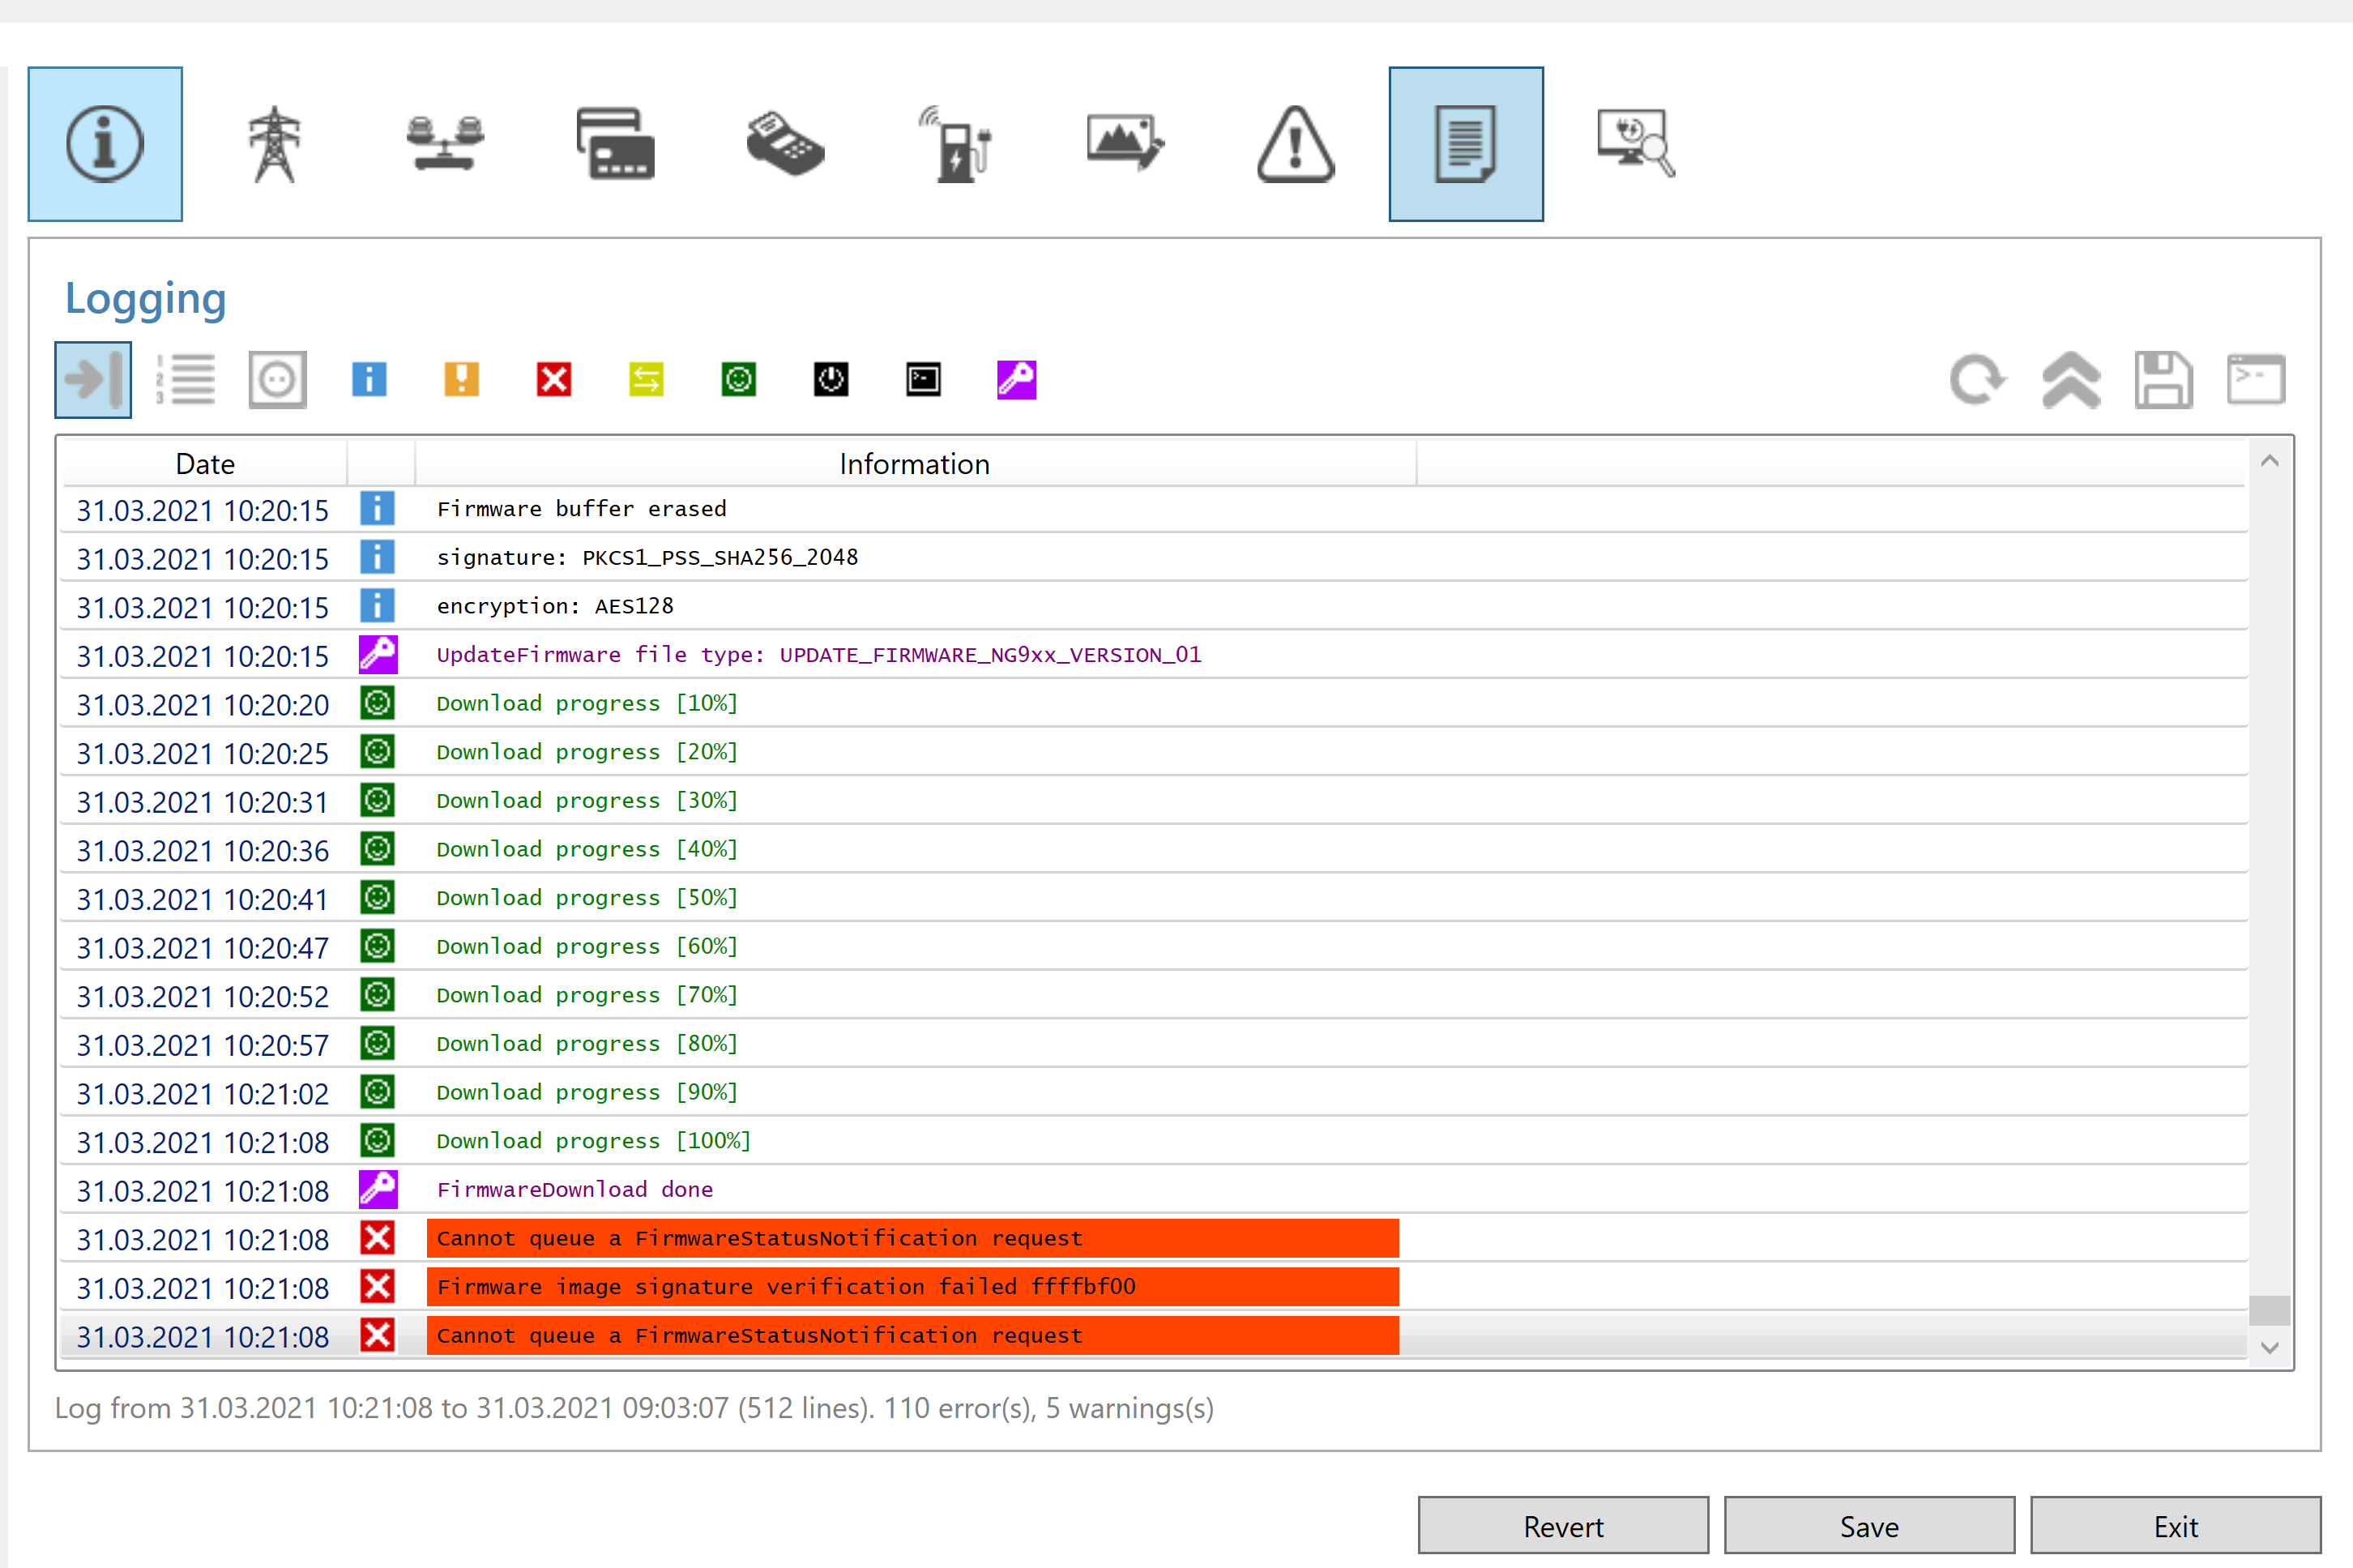
In this tab is also possible to run shell commands that will interact directly with the station. In the moment TMH has knwledge of two commands that can be ran:
evsim [connector] [EV]
txerase
The first one allows the user to simulate one of the following EVs:
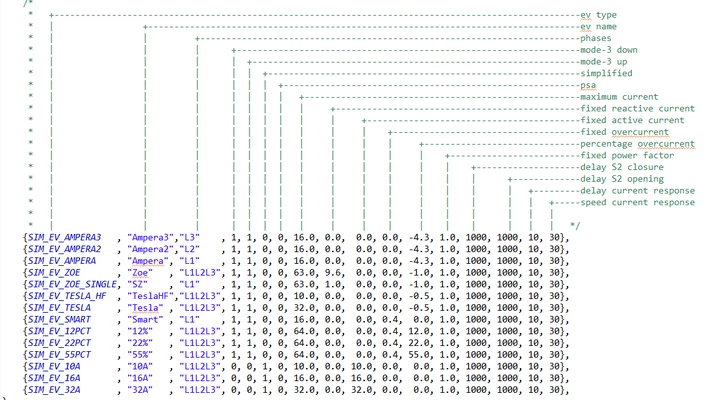
For example, to simulate a Tesla, we can run the command evsim 1 tesla, meaning that we want to simulate a Tesla in the connector 1 of the CP.
The command number 2. is used to erase any hanging messages buffered in ICU, like meter values or any other transaction related messages. This command shall be used in emergency cases.