ABL | eM4 - Configuration for ChargePilot
Before starting the configuration, please check the charger firmware version complies with the latest compatible firmware version.
I. Configuration per web UI
Configuration via web app does not work with the 2.0p4, instead only via ABL app.
From 2.0p7 onwards the configuration can be set via a web app.
Connection to the chargerThe ABL web portal can be accessed by entering the wallbox IP-address in the web browser. On the web page you can change the role to installer at “Change role” for Admin/Edit mode.
| 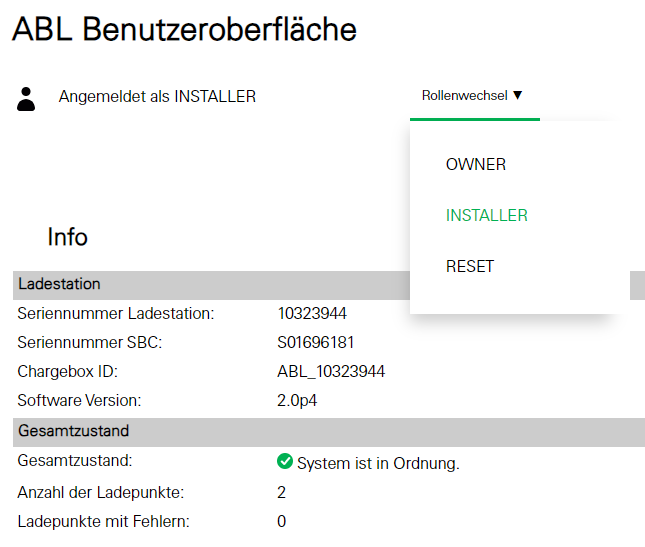 |
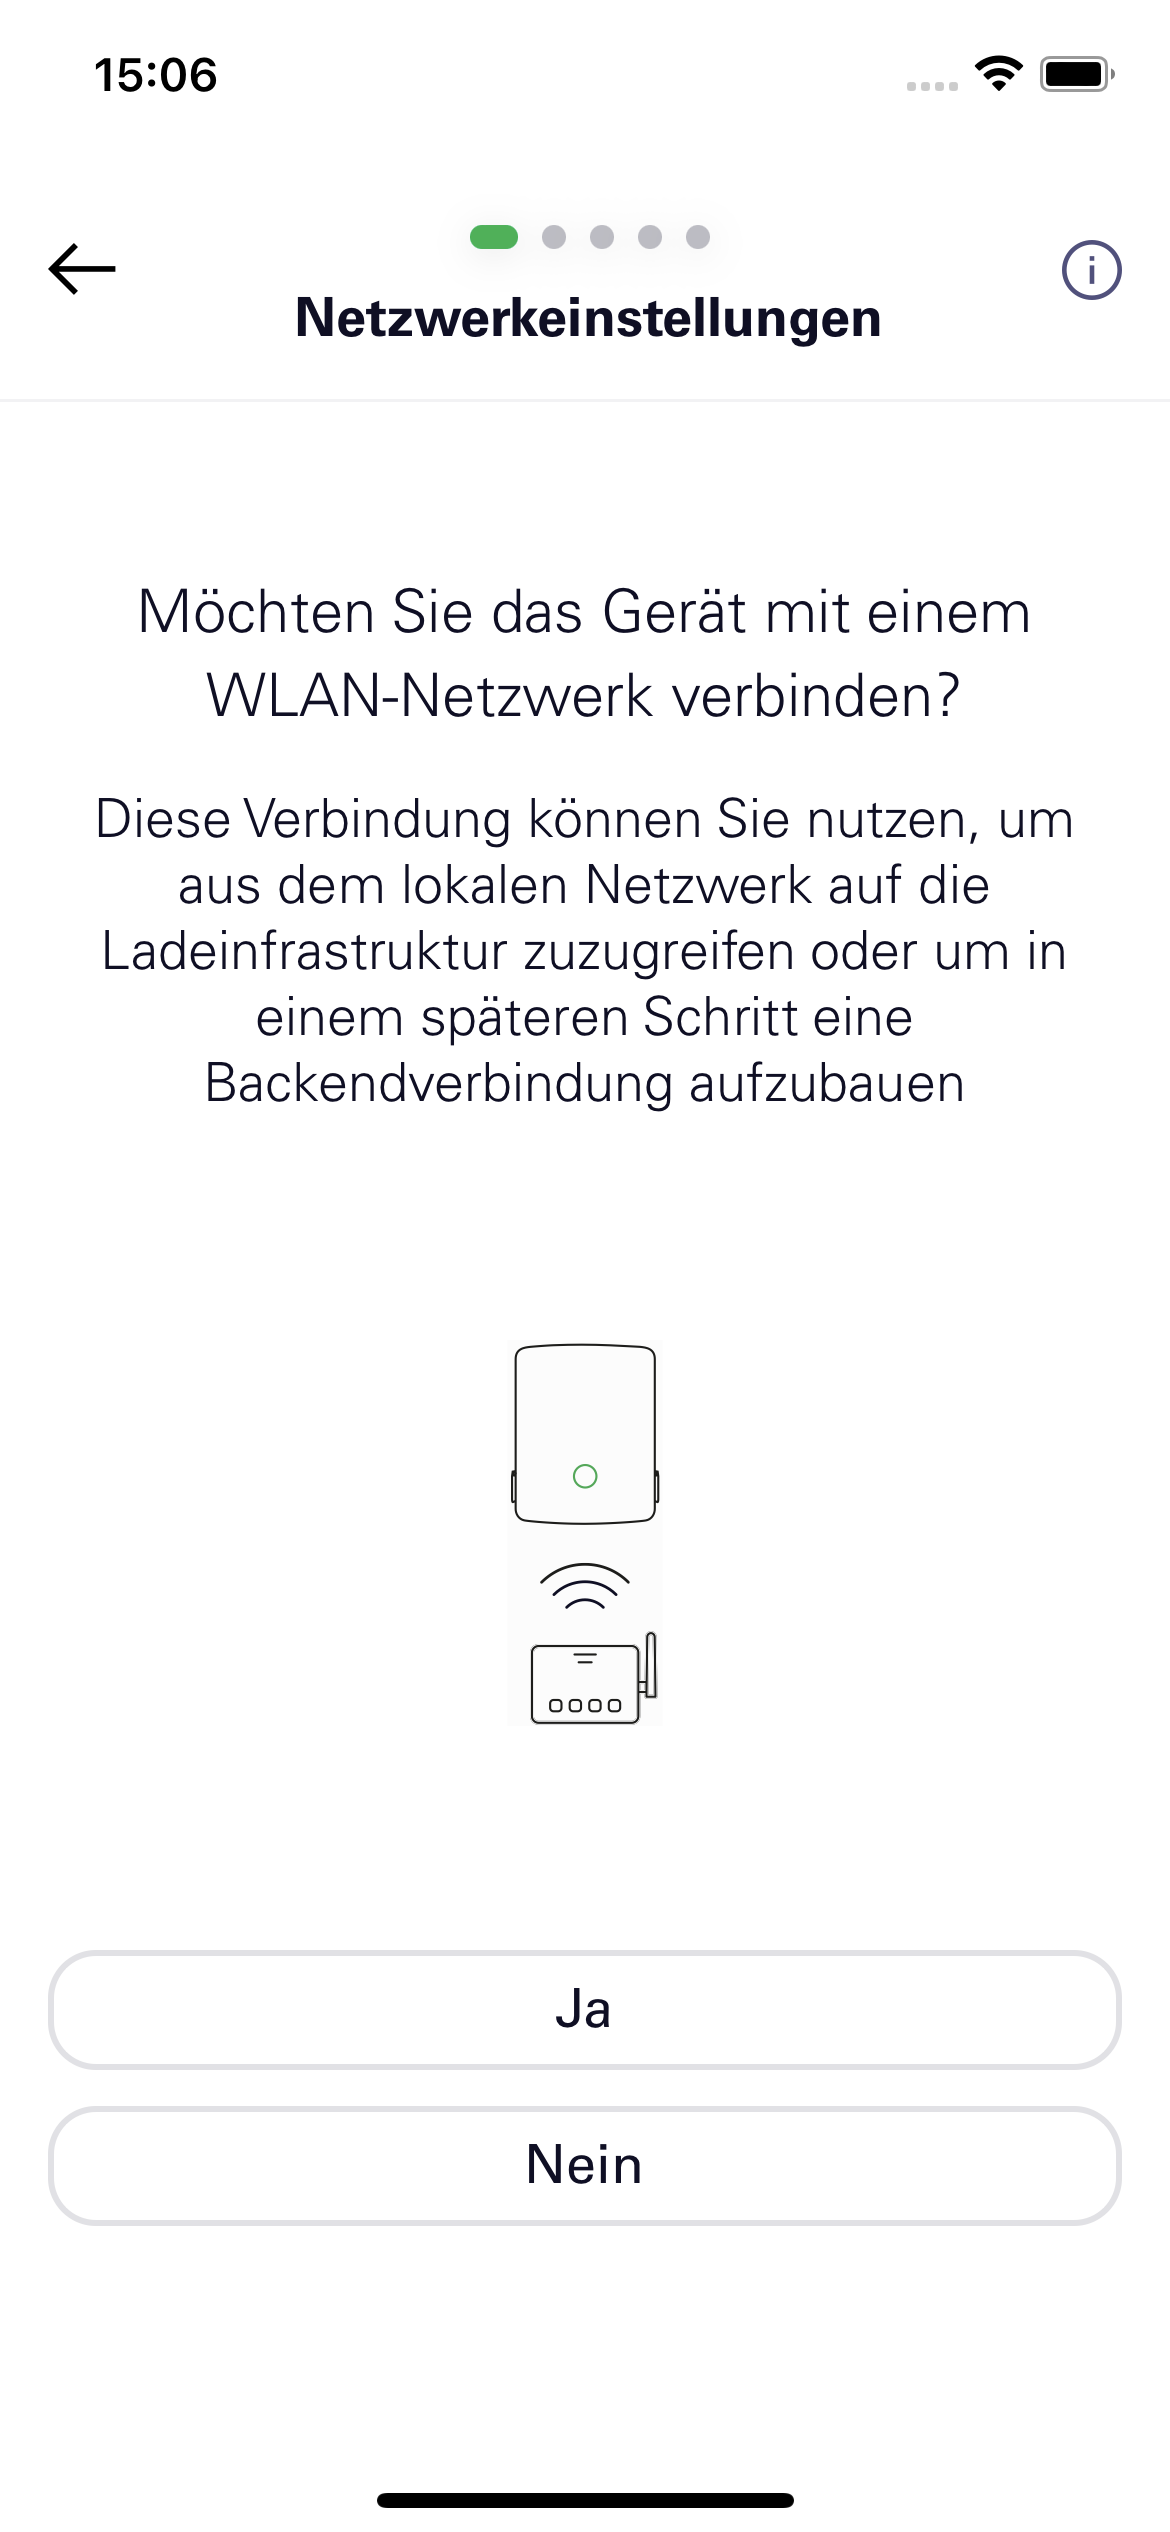
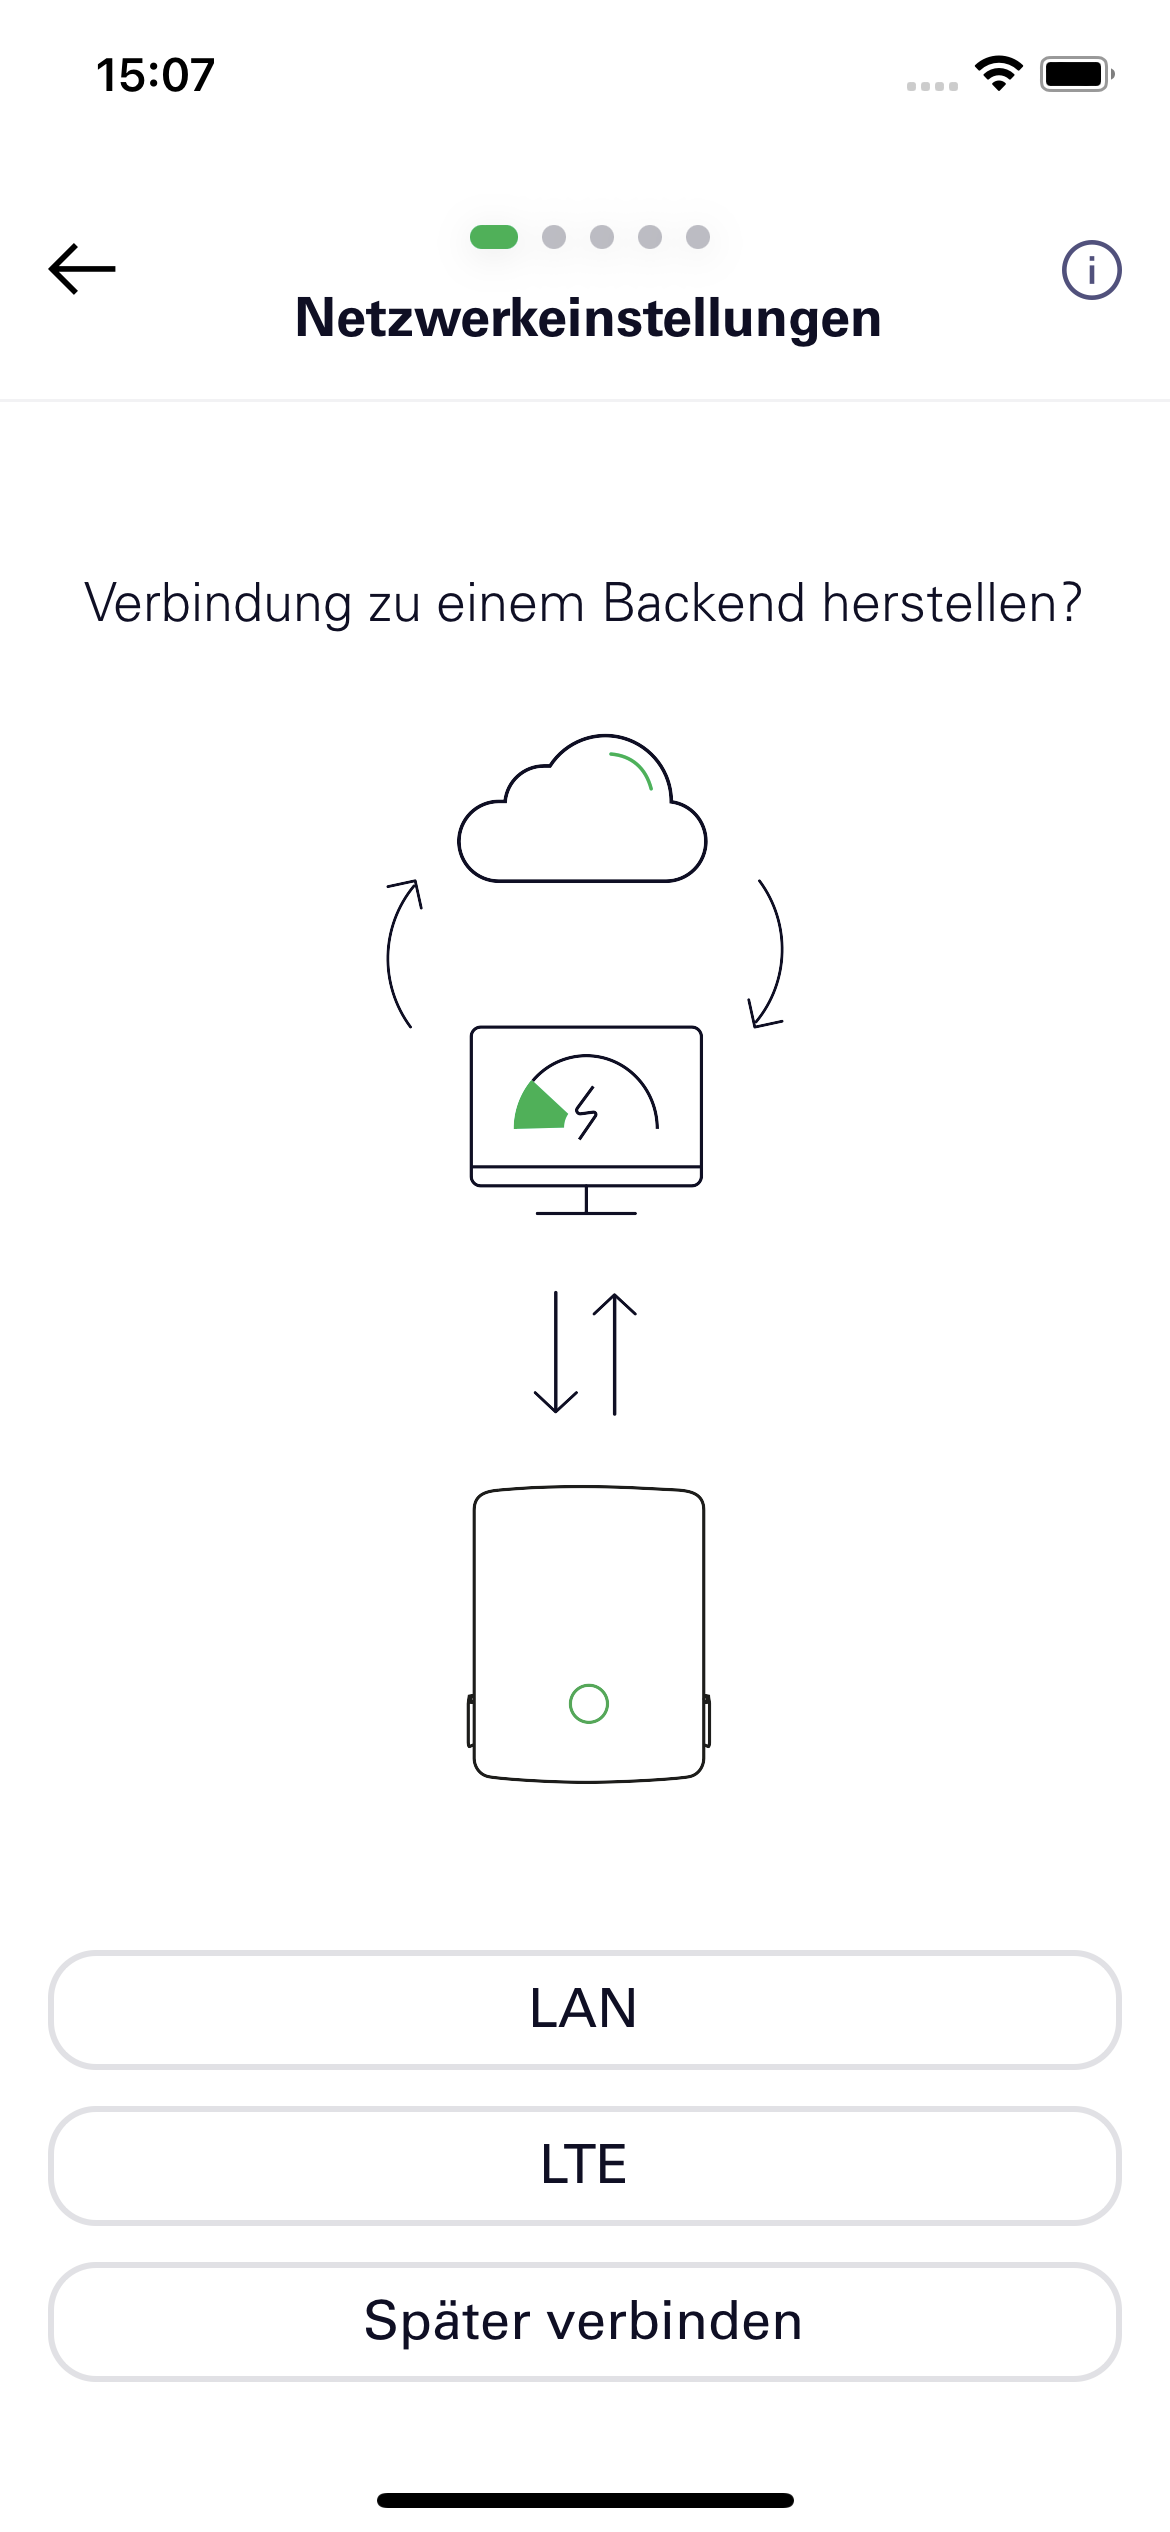
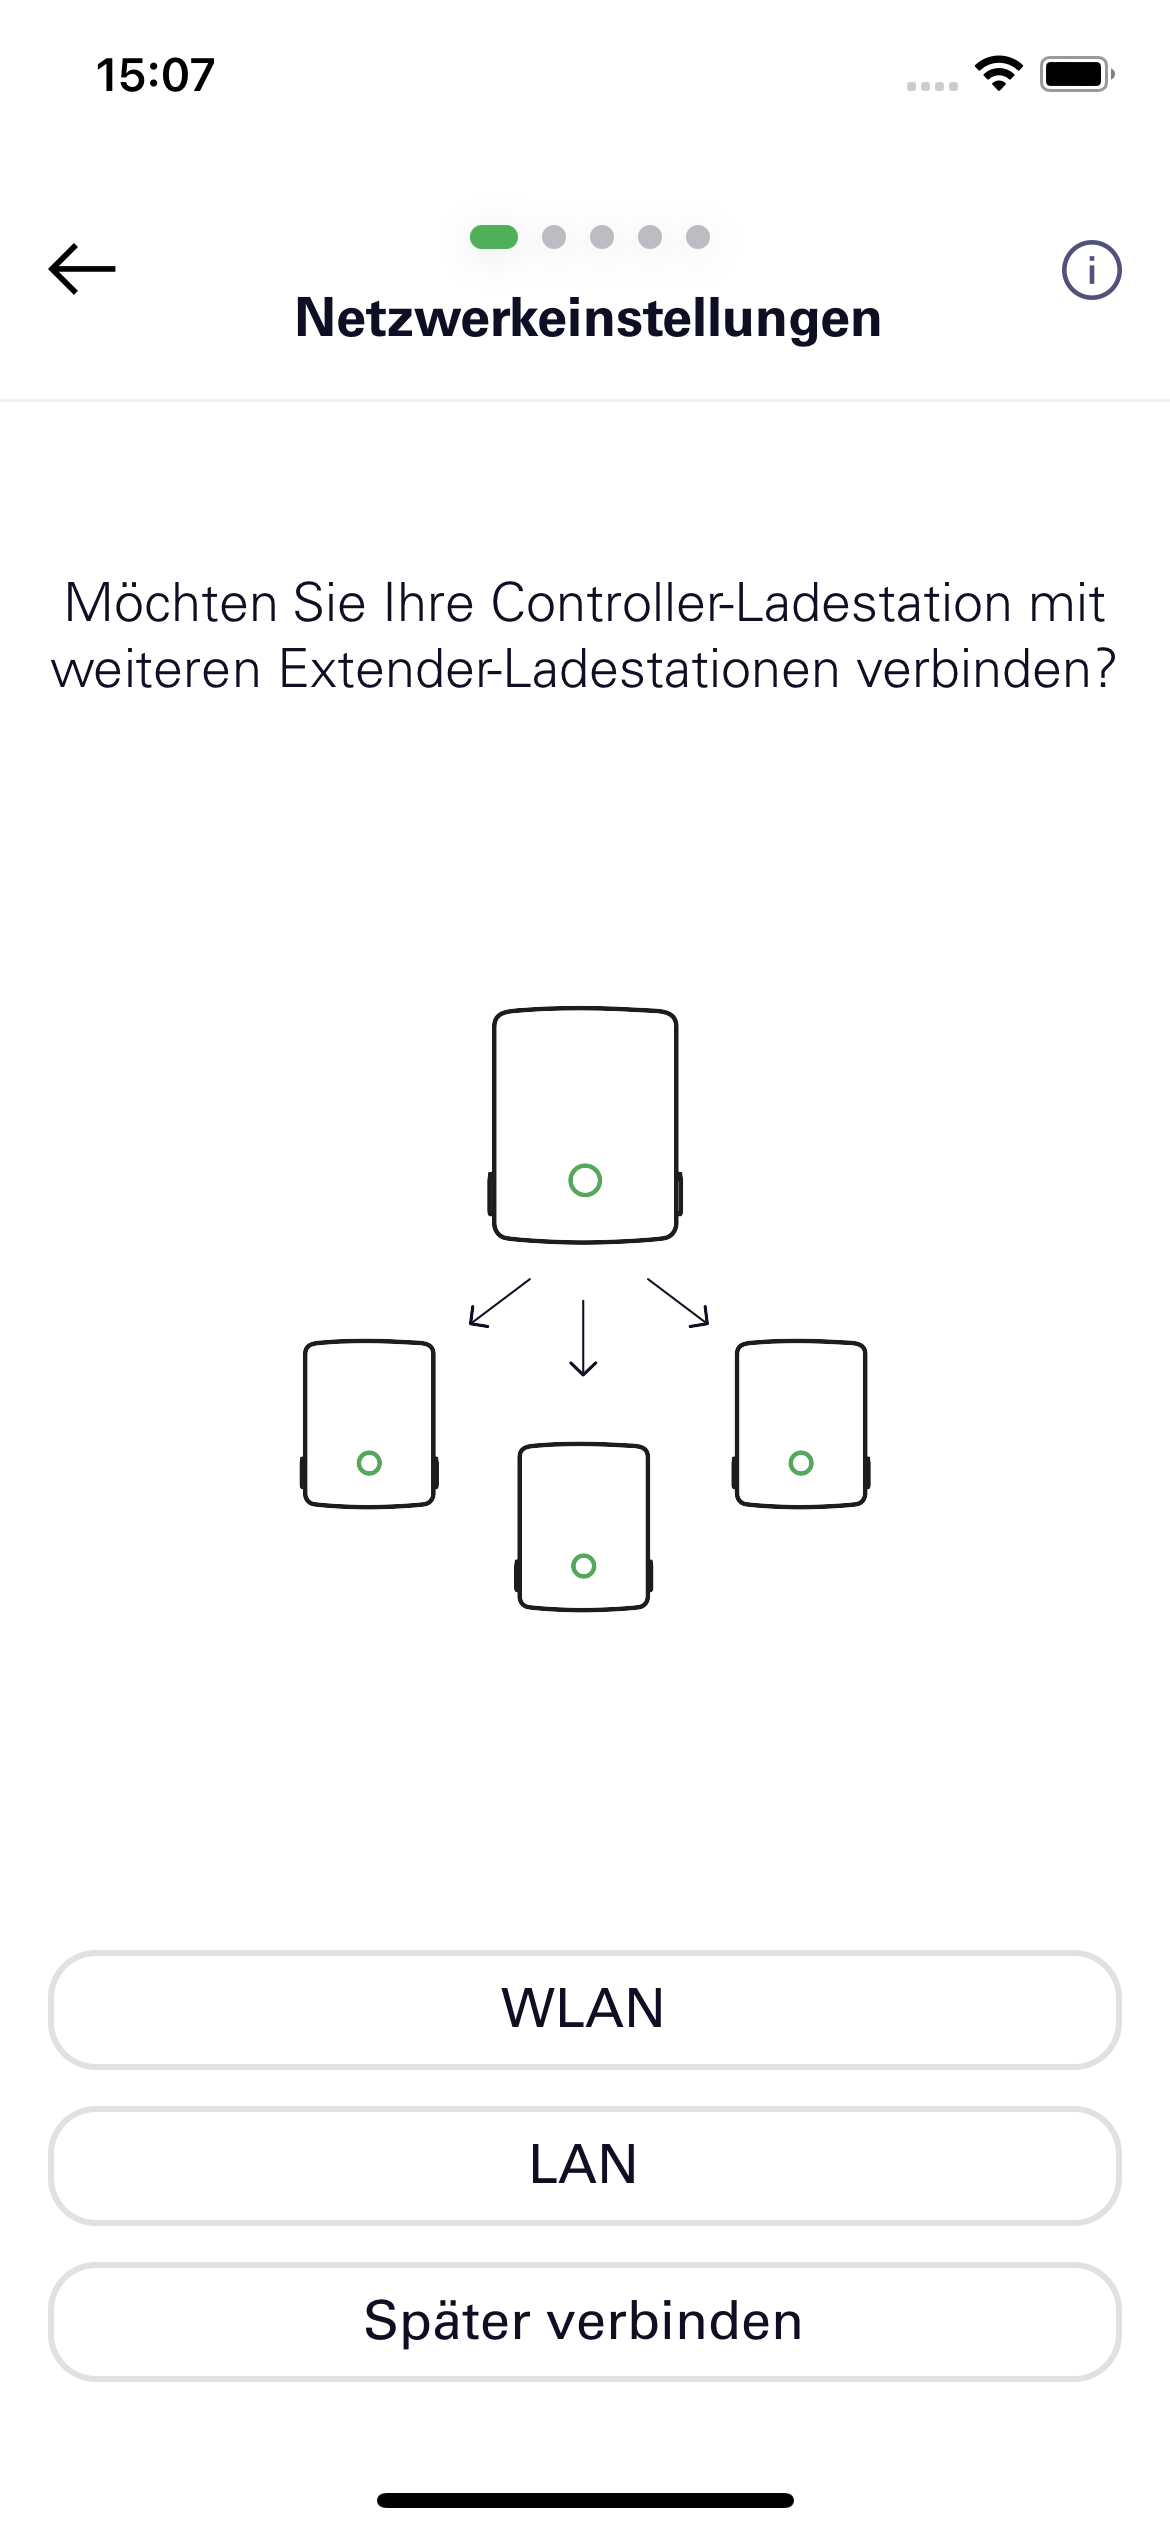
Network settings
“LAN” is enabled in the pre-configuration of ChargePilot | 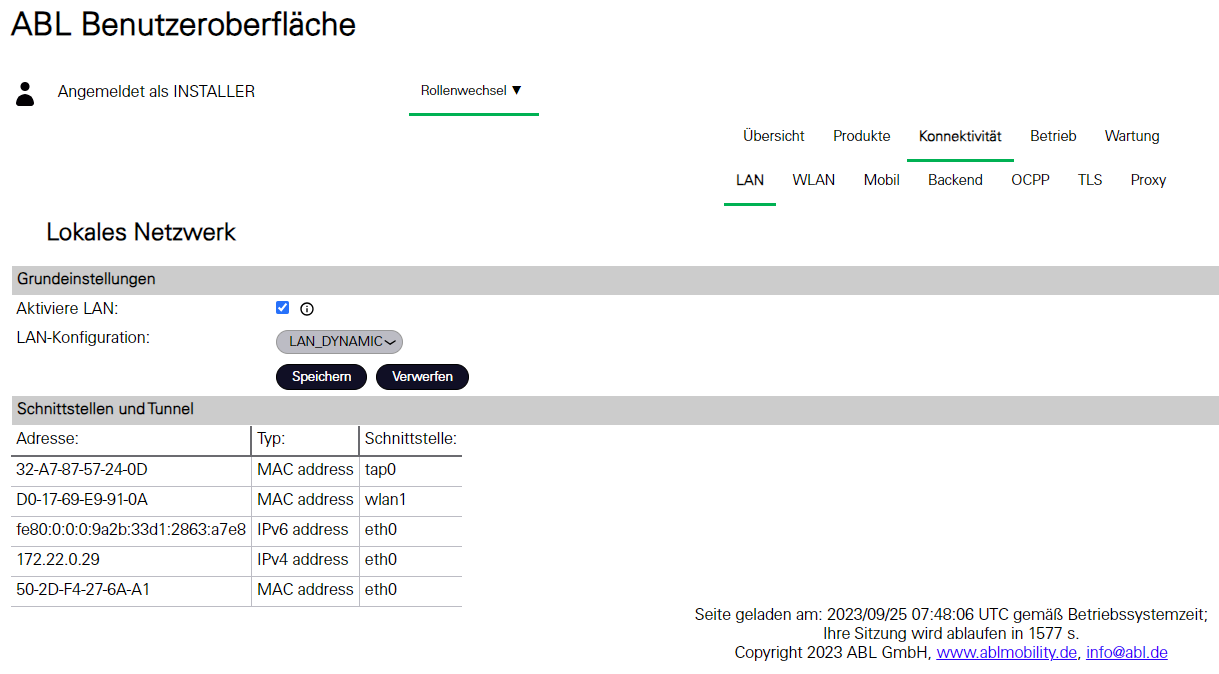 |
OCPP settings
| 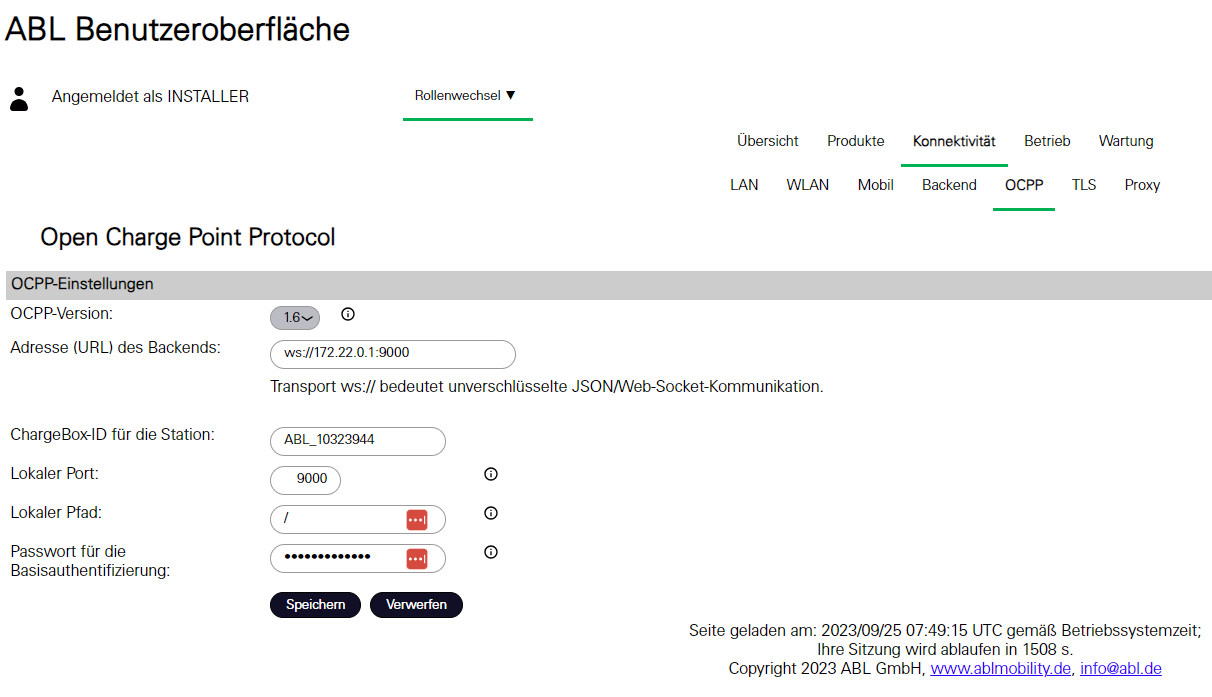 |
Other charger settingsAuthorization settings
| 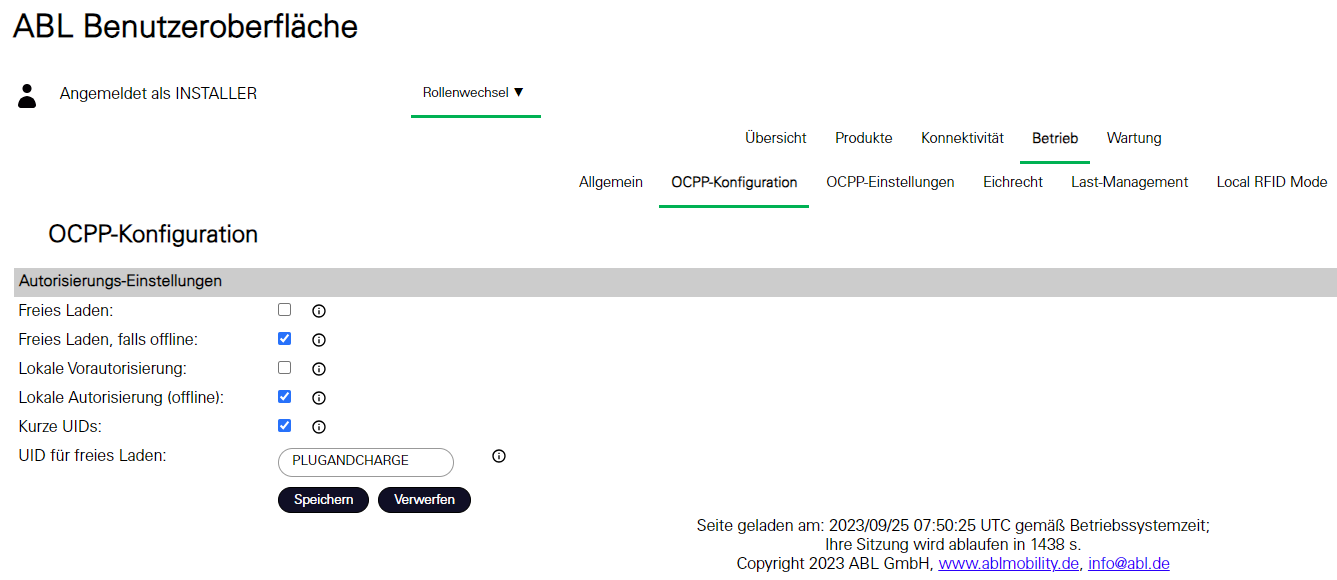 |
Fallback settingseMH3 charger doesn’t accept decimal TxDefaultProfile values, which will result in charger crash. Therefore, the settings of fallback value in the Admin UI has to be a multiple of the number of connectors. In the example, the fallback value is 12A, then each connector will get 6A. | 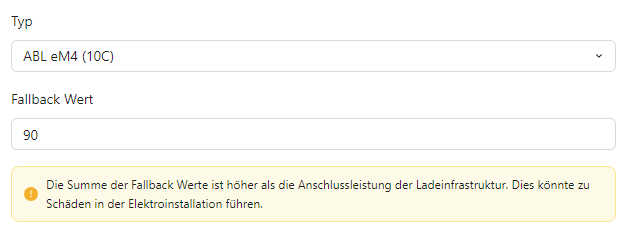 |
Offline behaviour settings
| 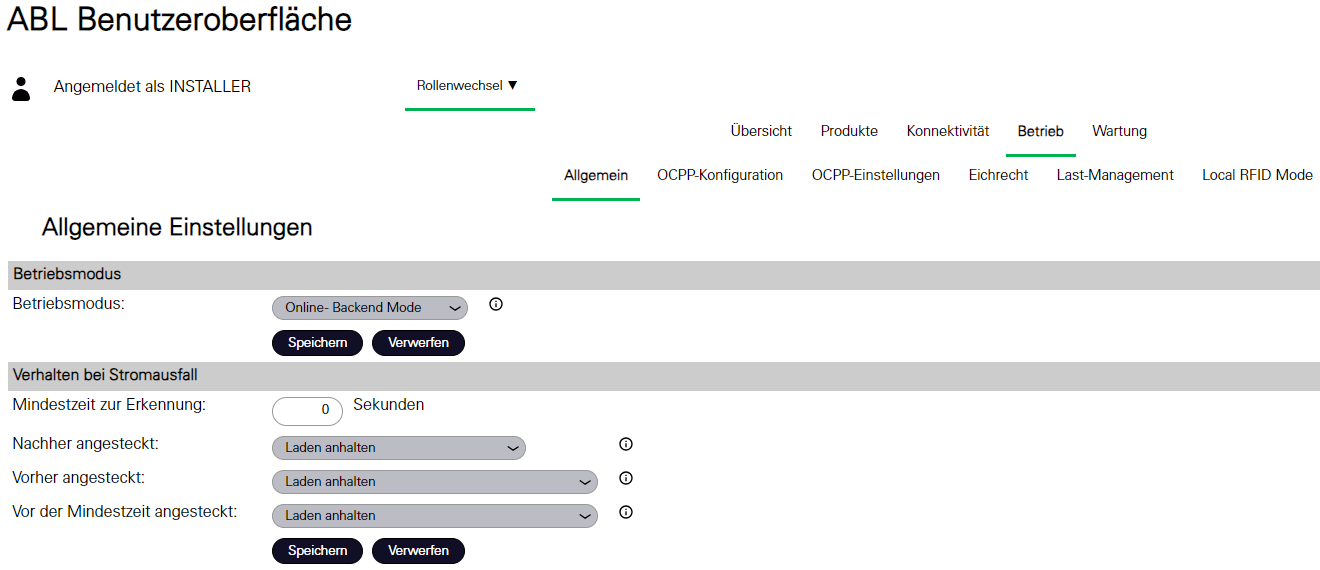 |
Load management
| 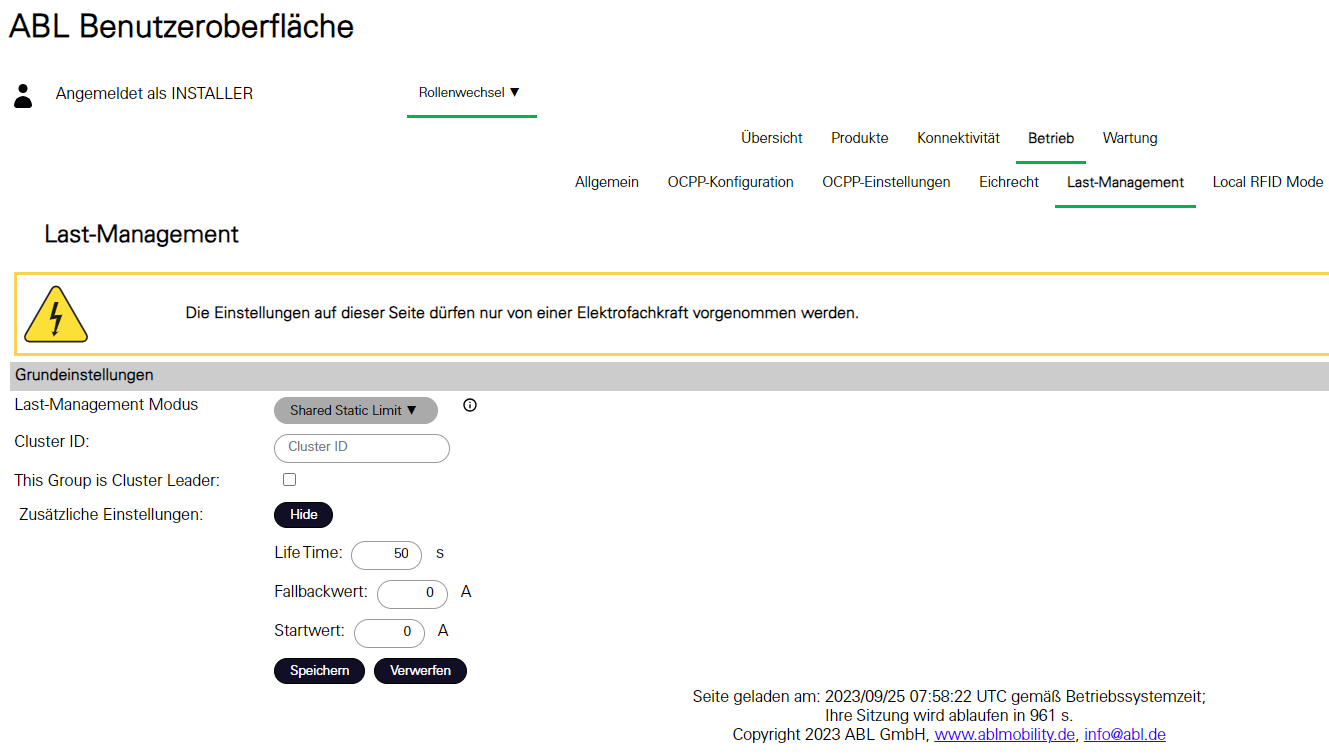 |
|
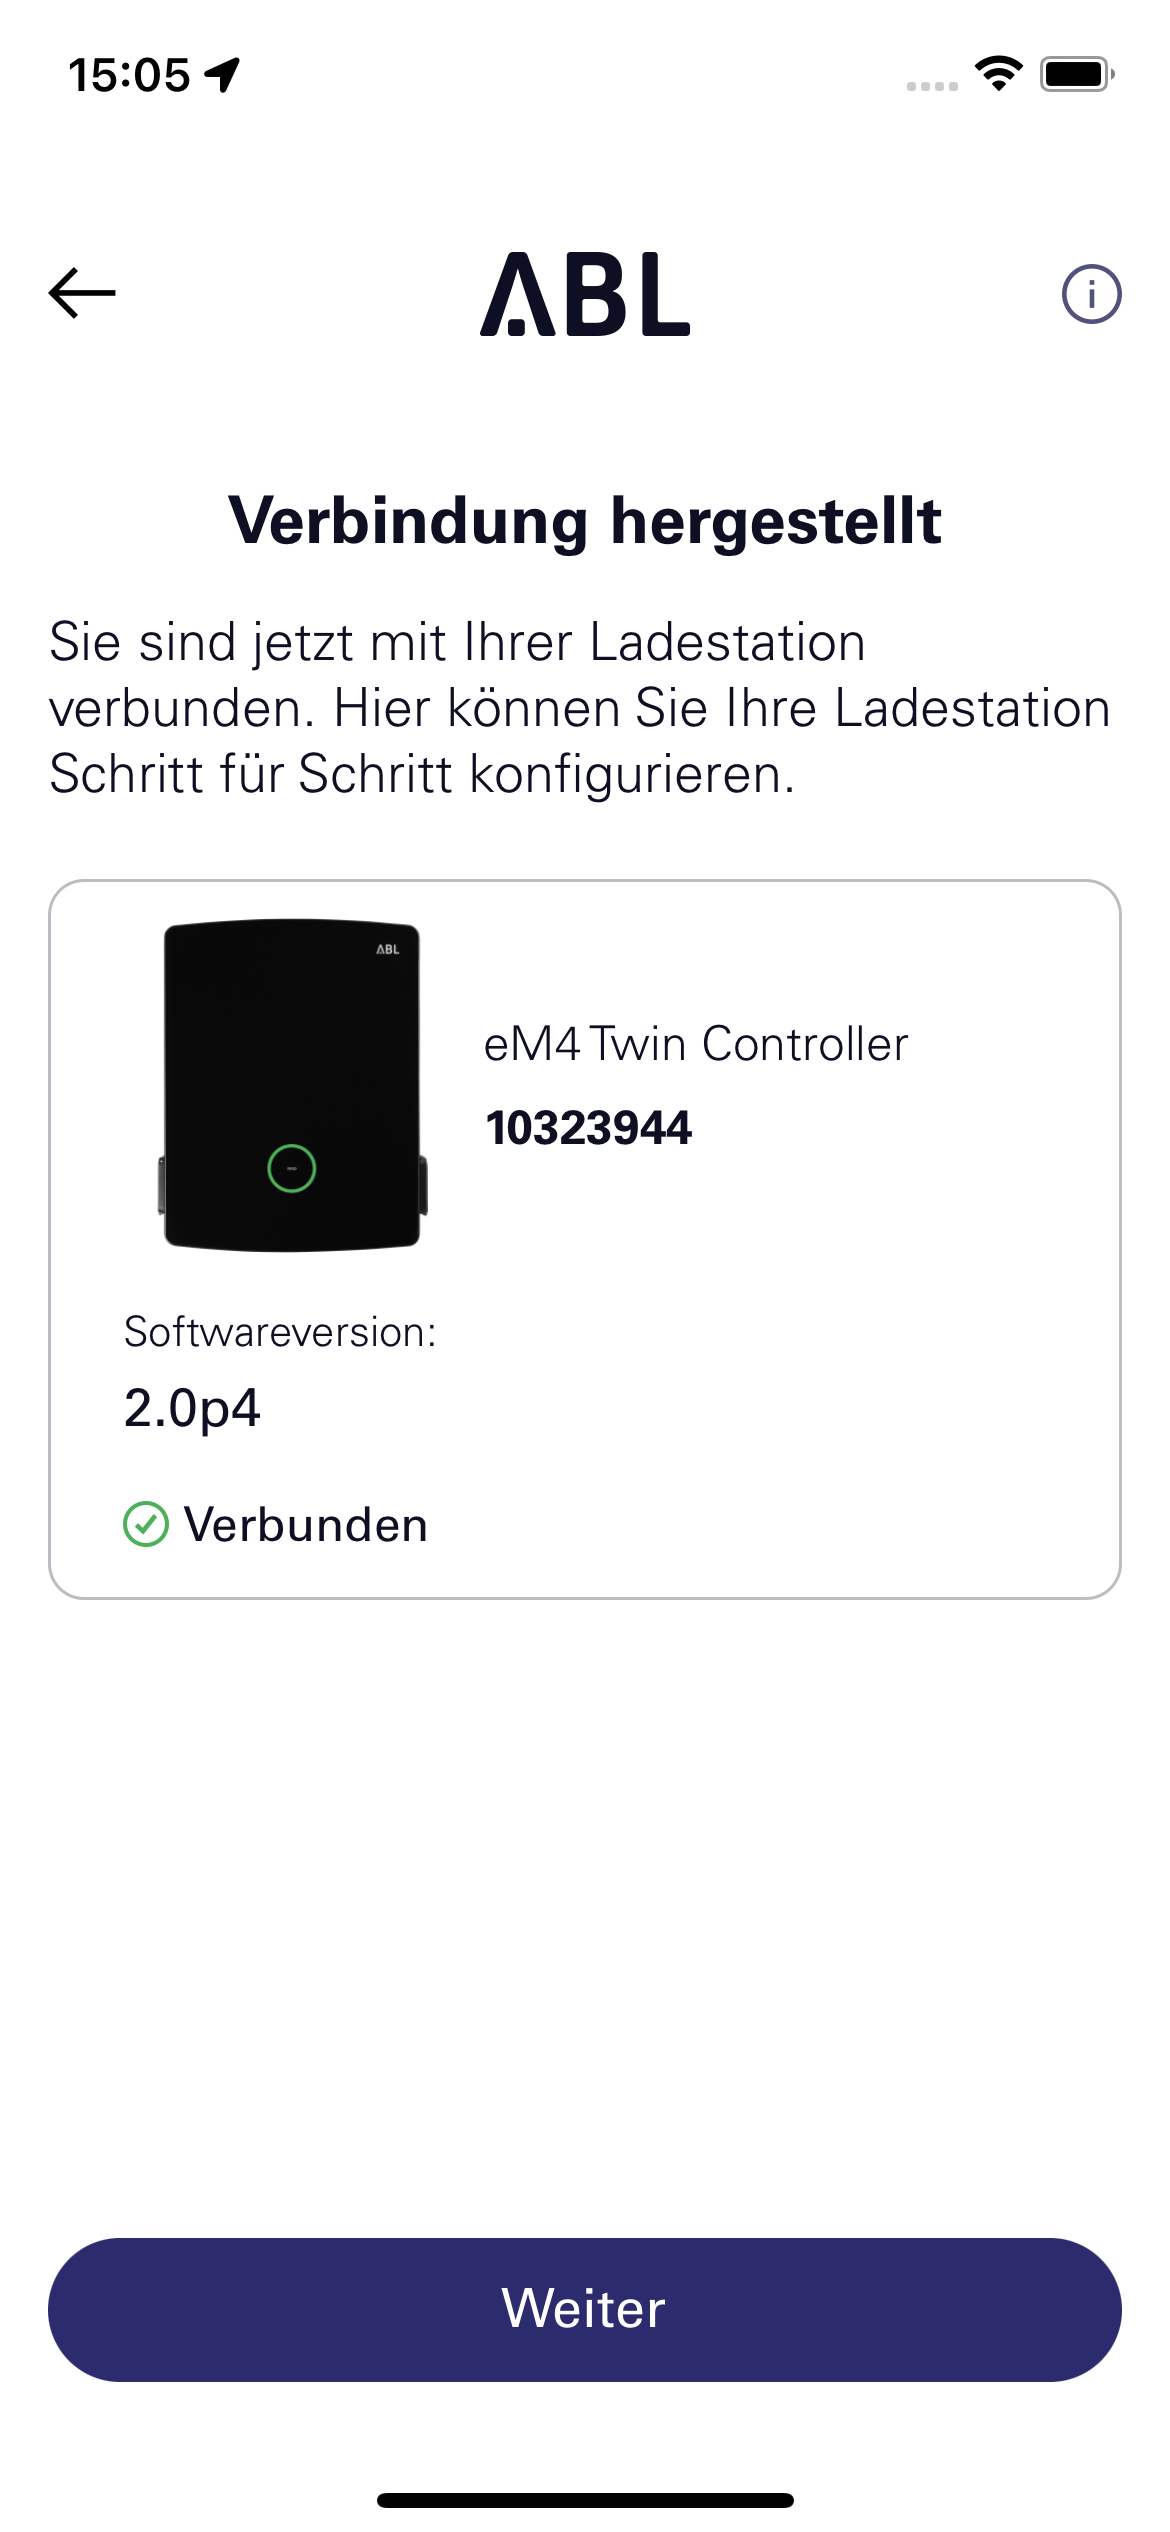
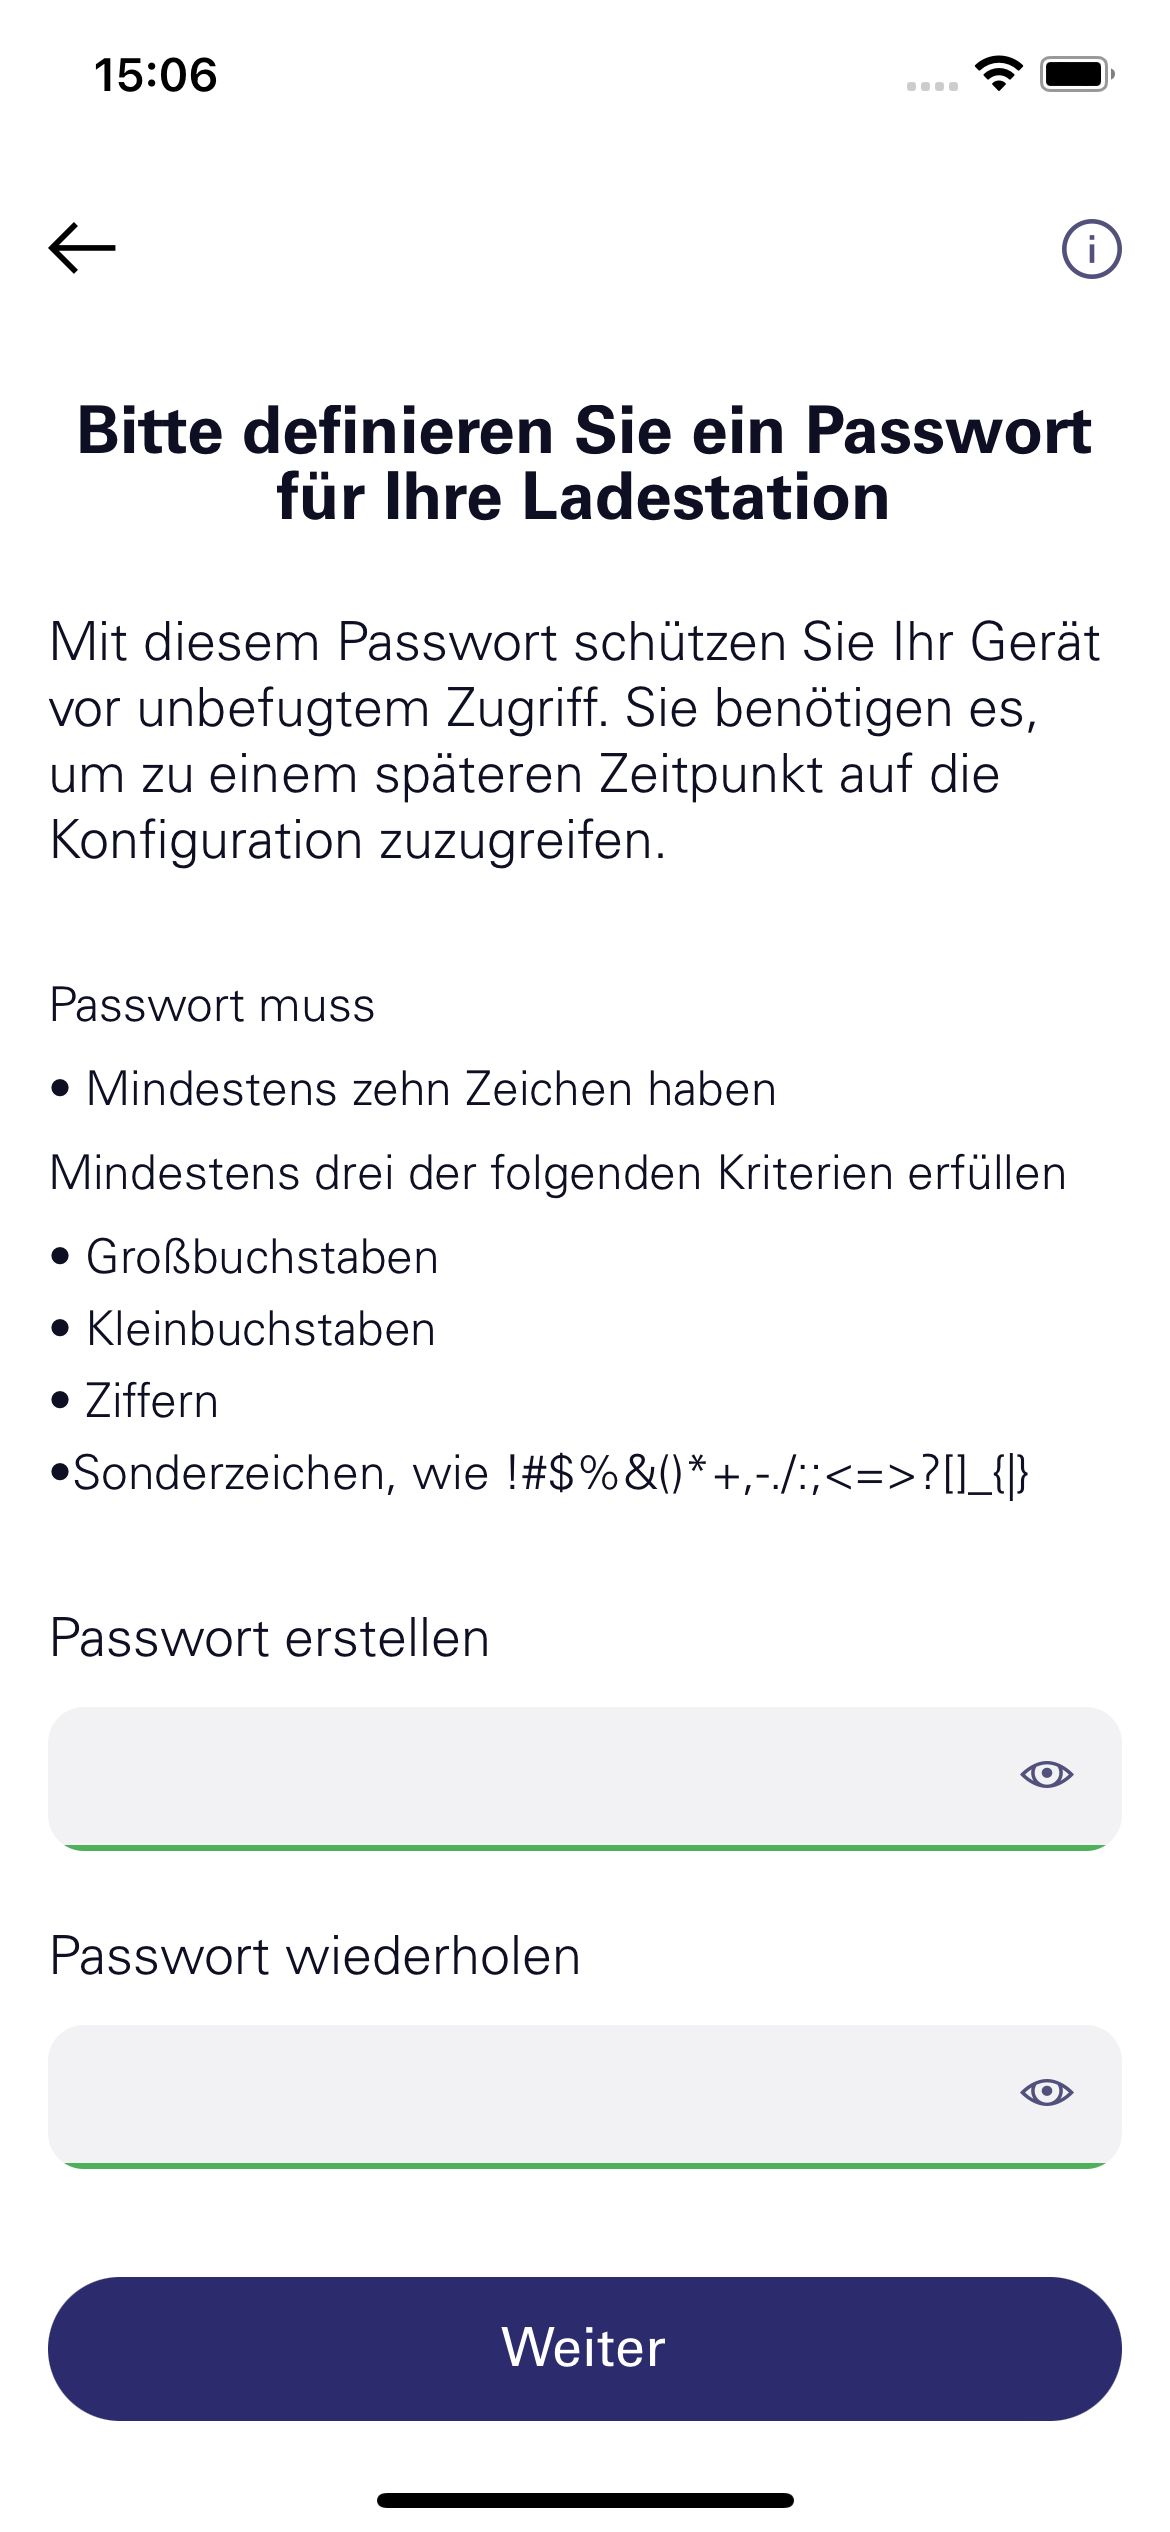
For the initial commissioning, it is essential to assign the password via the app and thus the configuration with the app via WLAN is secured. See Chapters II-1 and -2 below. | |
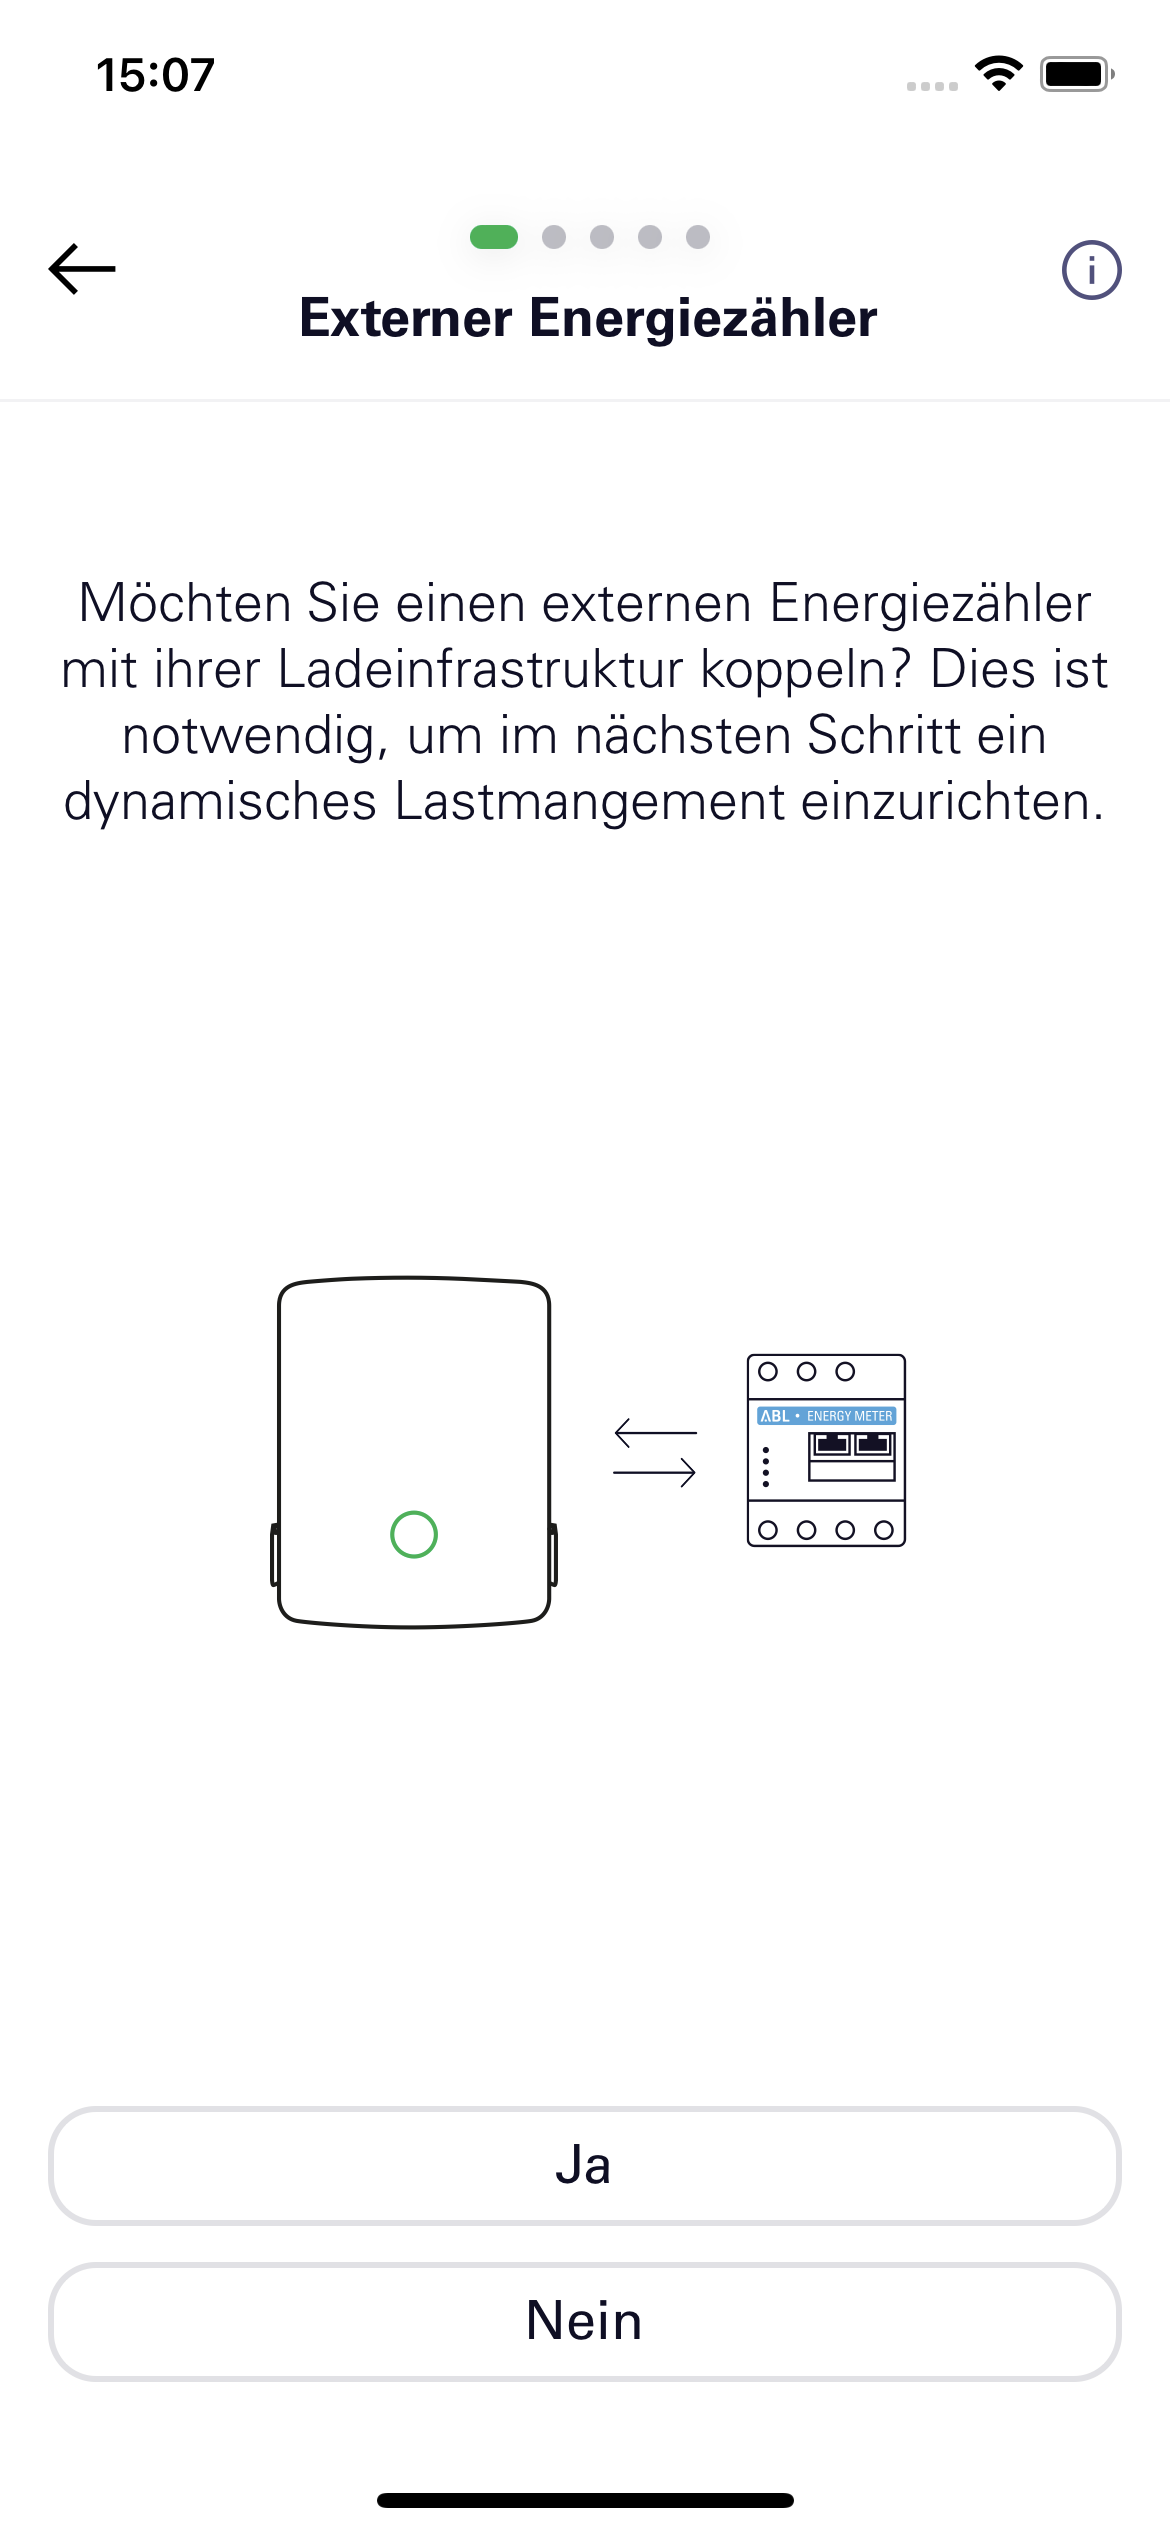
II. Configuration per app
| 1 |
|  |
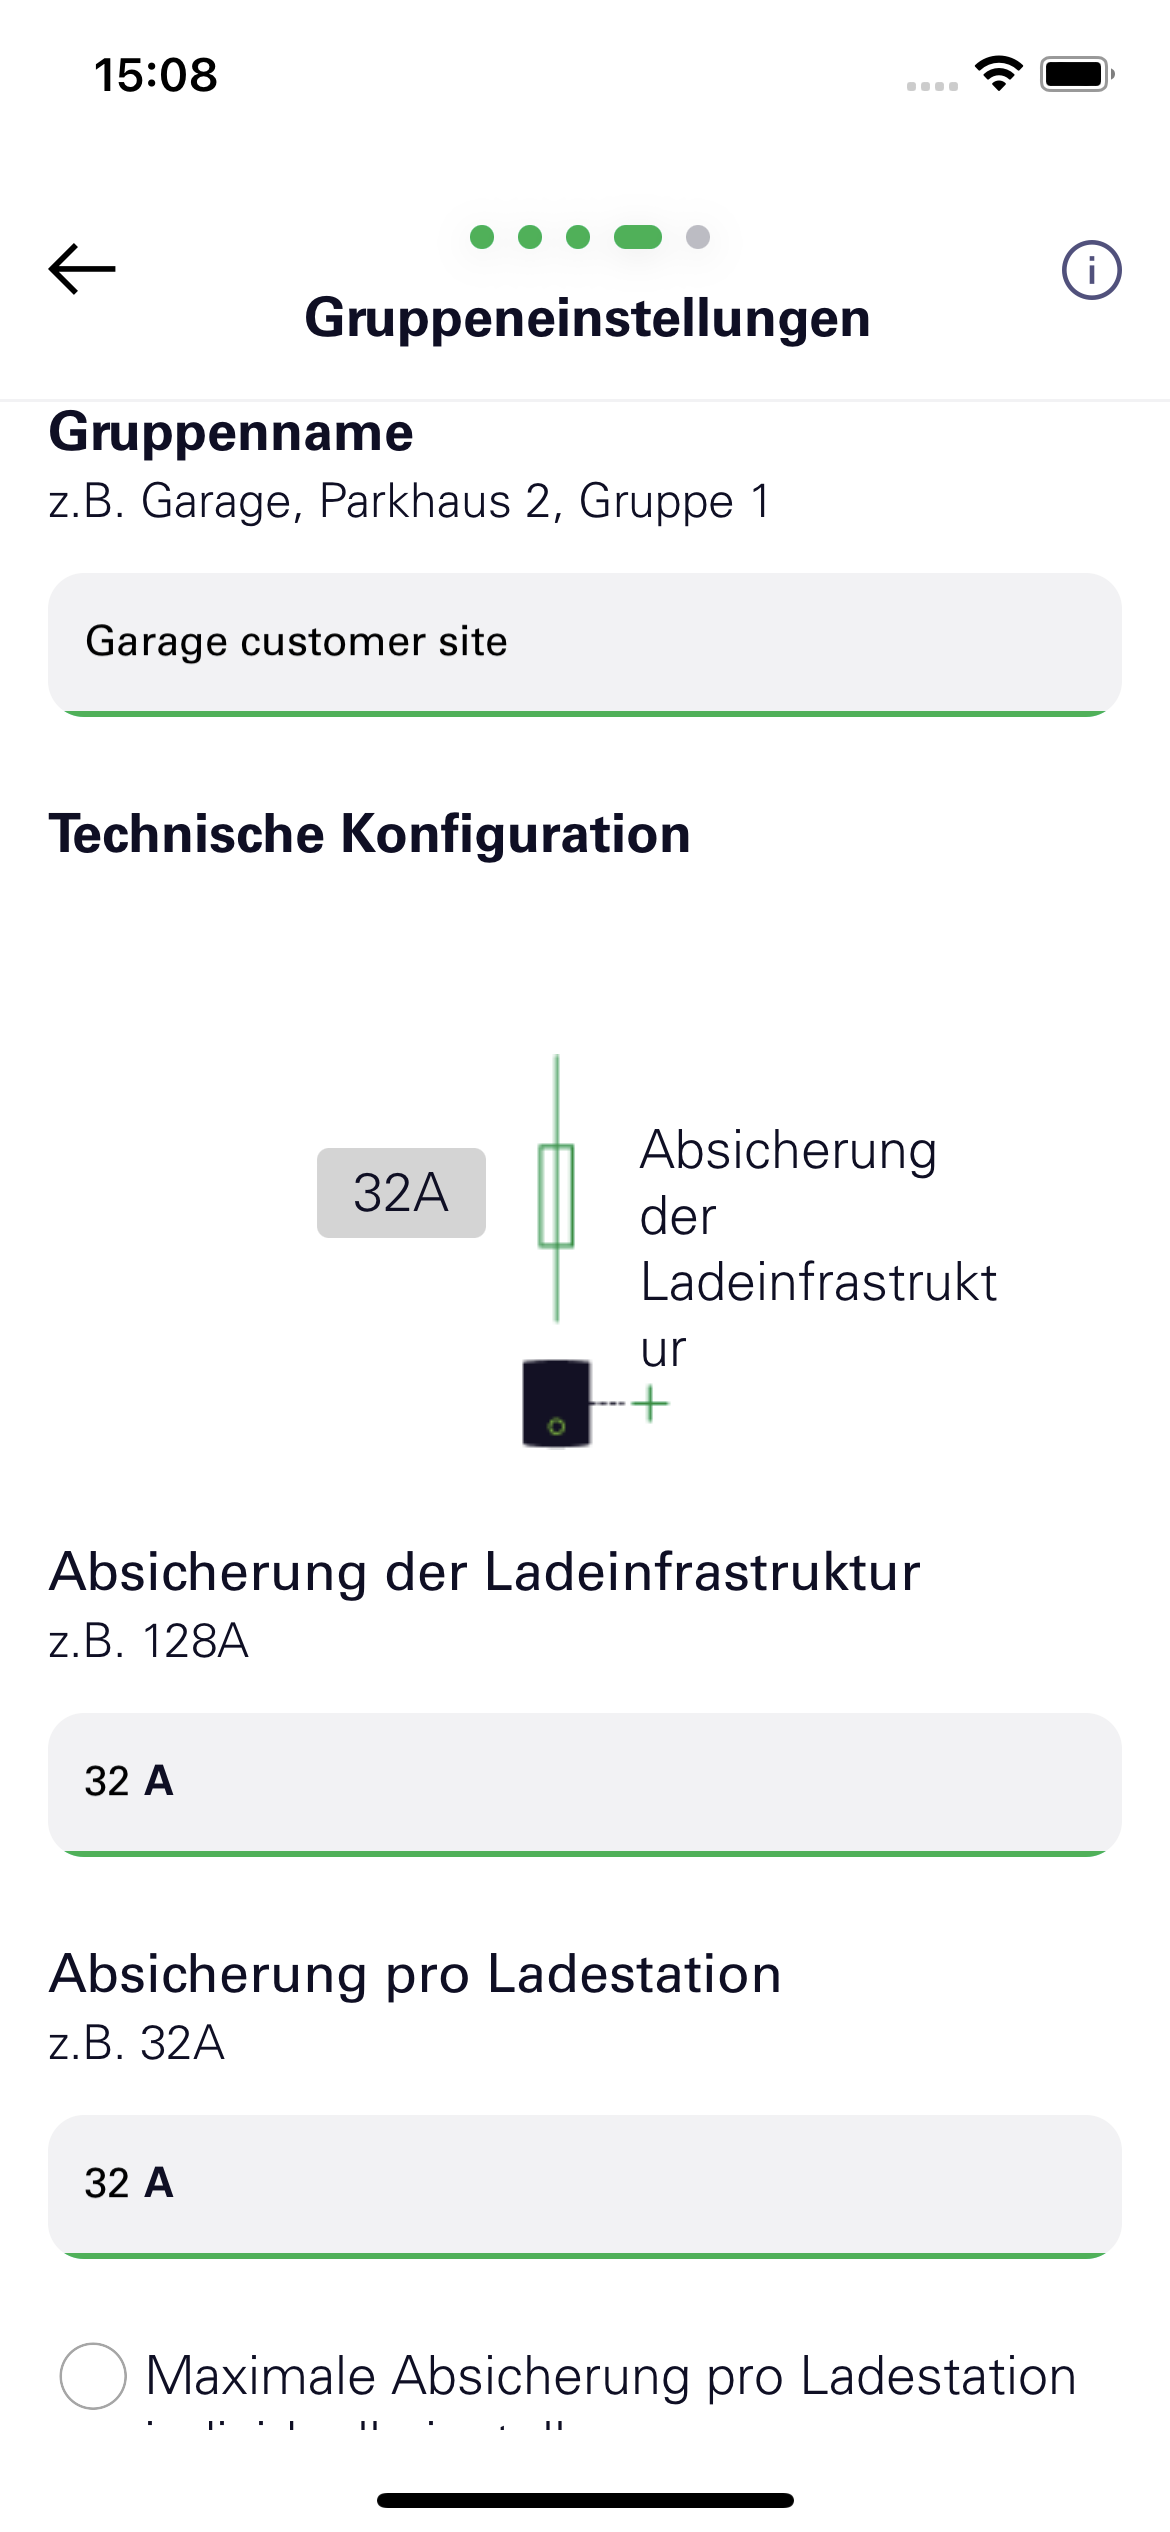
| 2 |
|  |
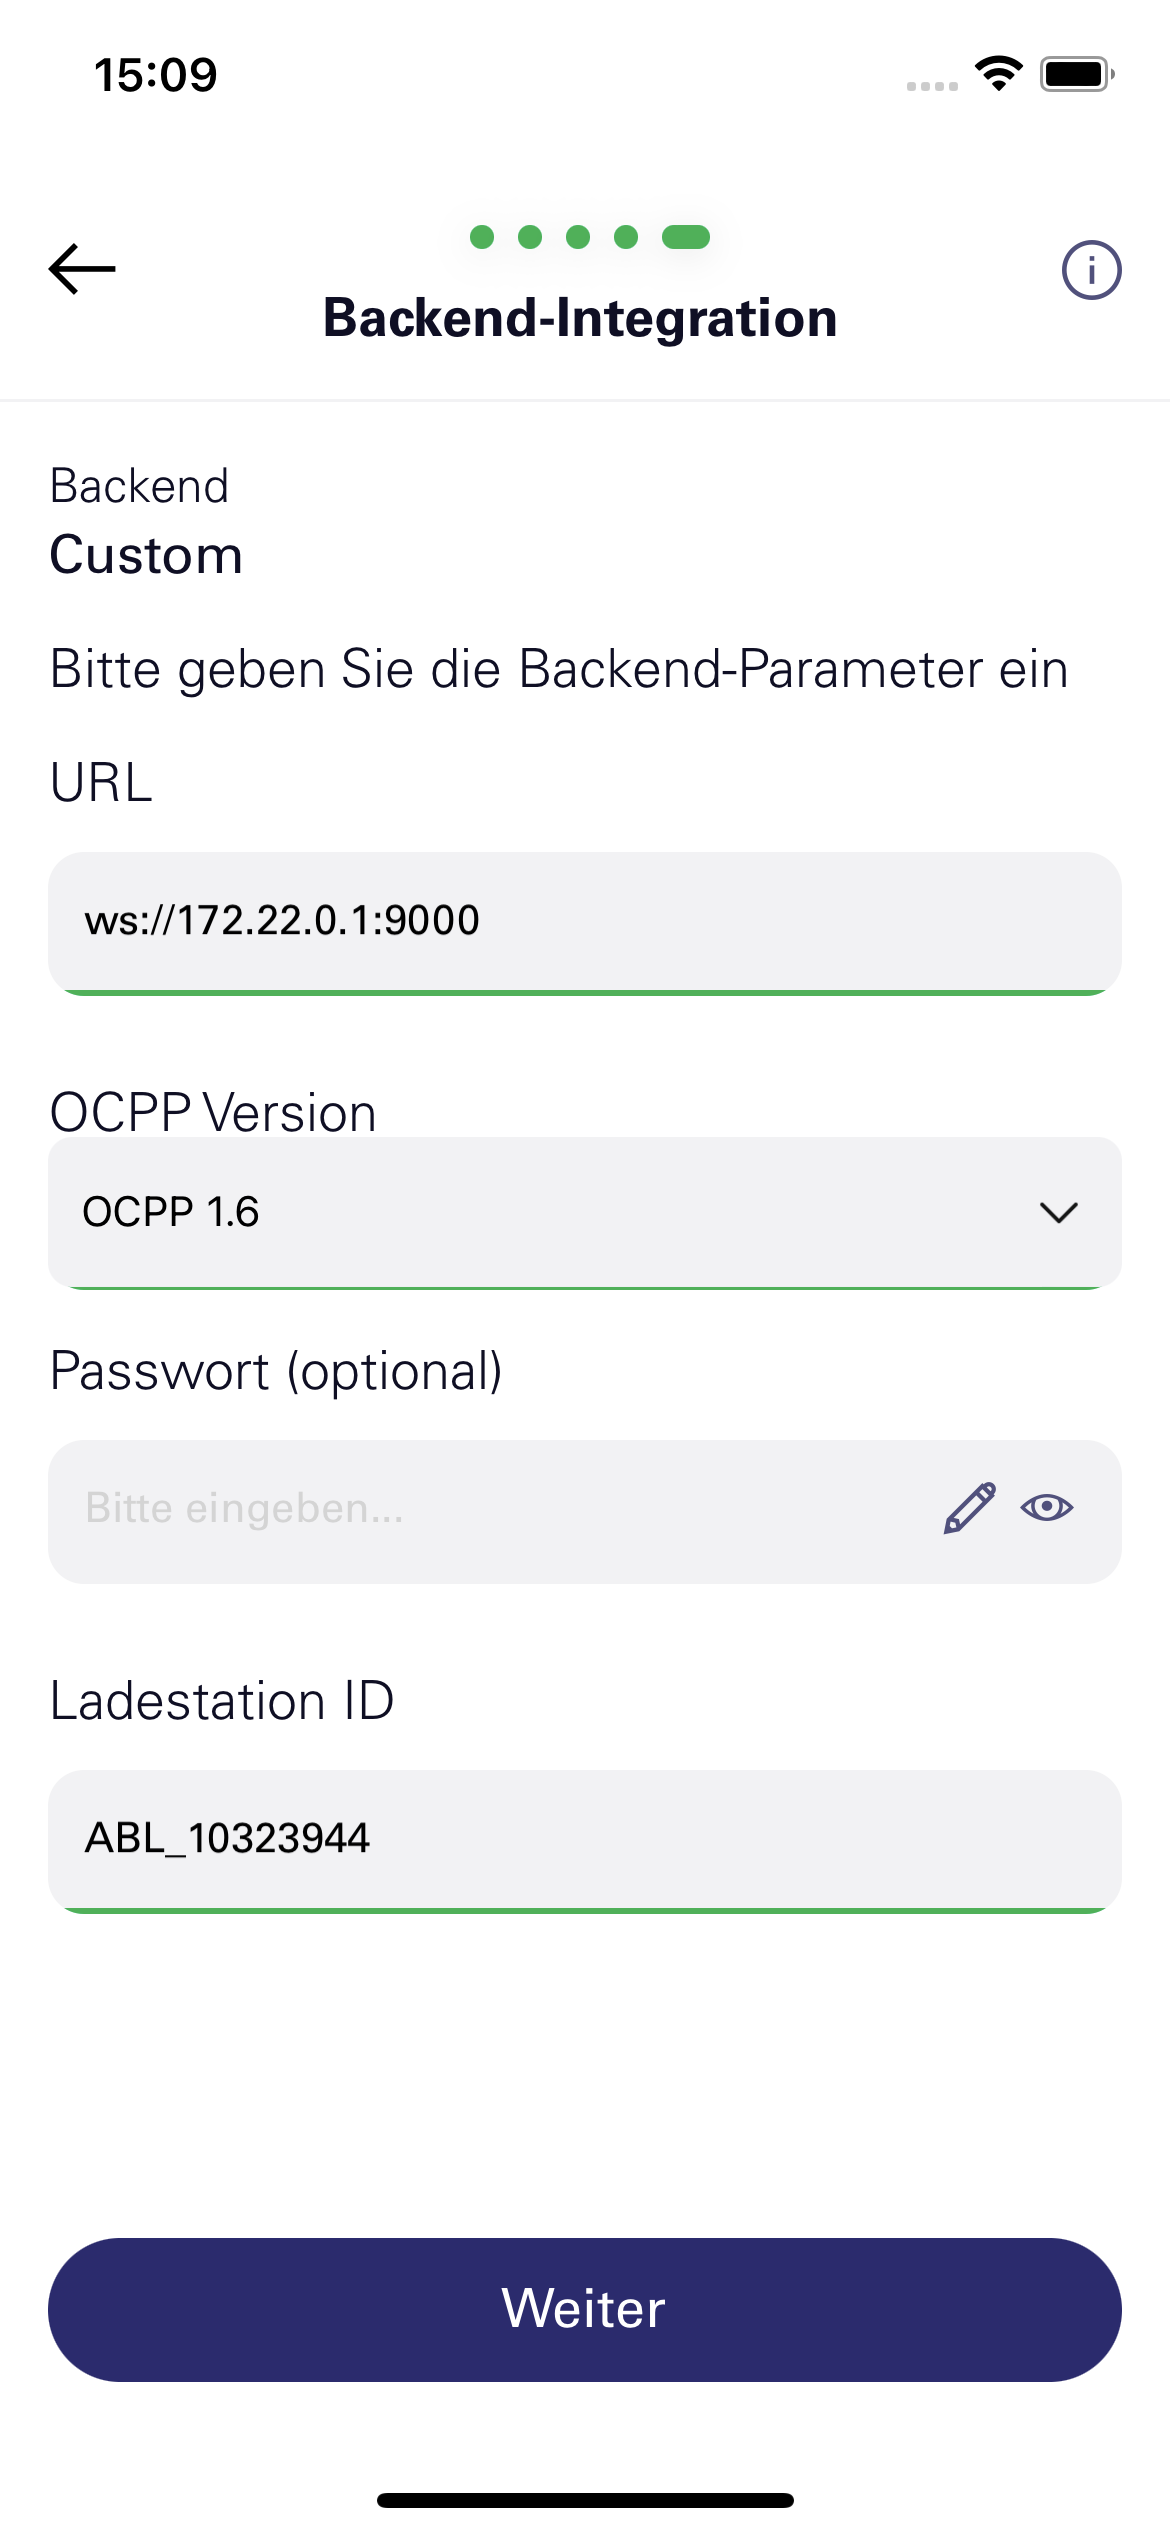
| 3 |
|  |
| 4 |
|  |
| 5 |
|  |
| 6 |
|  |
| 7 |
|
 |
| 8 |
| -20230925-082810.PNG?inst-v=e9952b72-35e1-4842-a16d-e3adecaf726d) |
| 9 |
|  |
| 10 |
|  |